Welcome to the ANanoMouse Page.
Here we will create an interface for the AMIGA to use ps/2 optical and ball mice.
Based on Meegamouse code By Robert Cross
and the
PS2 library Written by Chris J. Kiick, January 2008.
I am fed up with fighting with ball mice on the amiga to get it to go where I want , I need an optical mouse or trackball!!
I have looked at the options available and decided this was the best way to go.
The pic versions , while small , have some inherent problems. With the pic version you need to power it to use optical mice , but the versions i looked at had no power option! I am sure there are some out there , but I have not seen them yet.
Also the pic version states that the mice sometimes lock up requiring unplugging the mouse and plugging it back in.
And last , but not least , I prefer the arduino IDE.
The nano needs to be powered all the time the AMIGA is on and the reset switch on board allows for resetting if it ever locks-up ( no plugging and unplugging mice ).
UPDATE:- To use a standard optical mouse you can power from the amiga. Details at the bottom of the page.
What you need :-
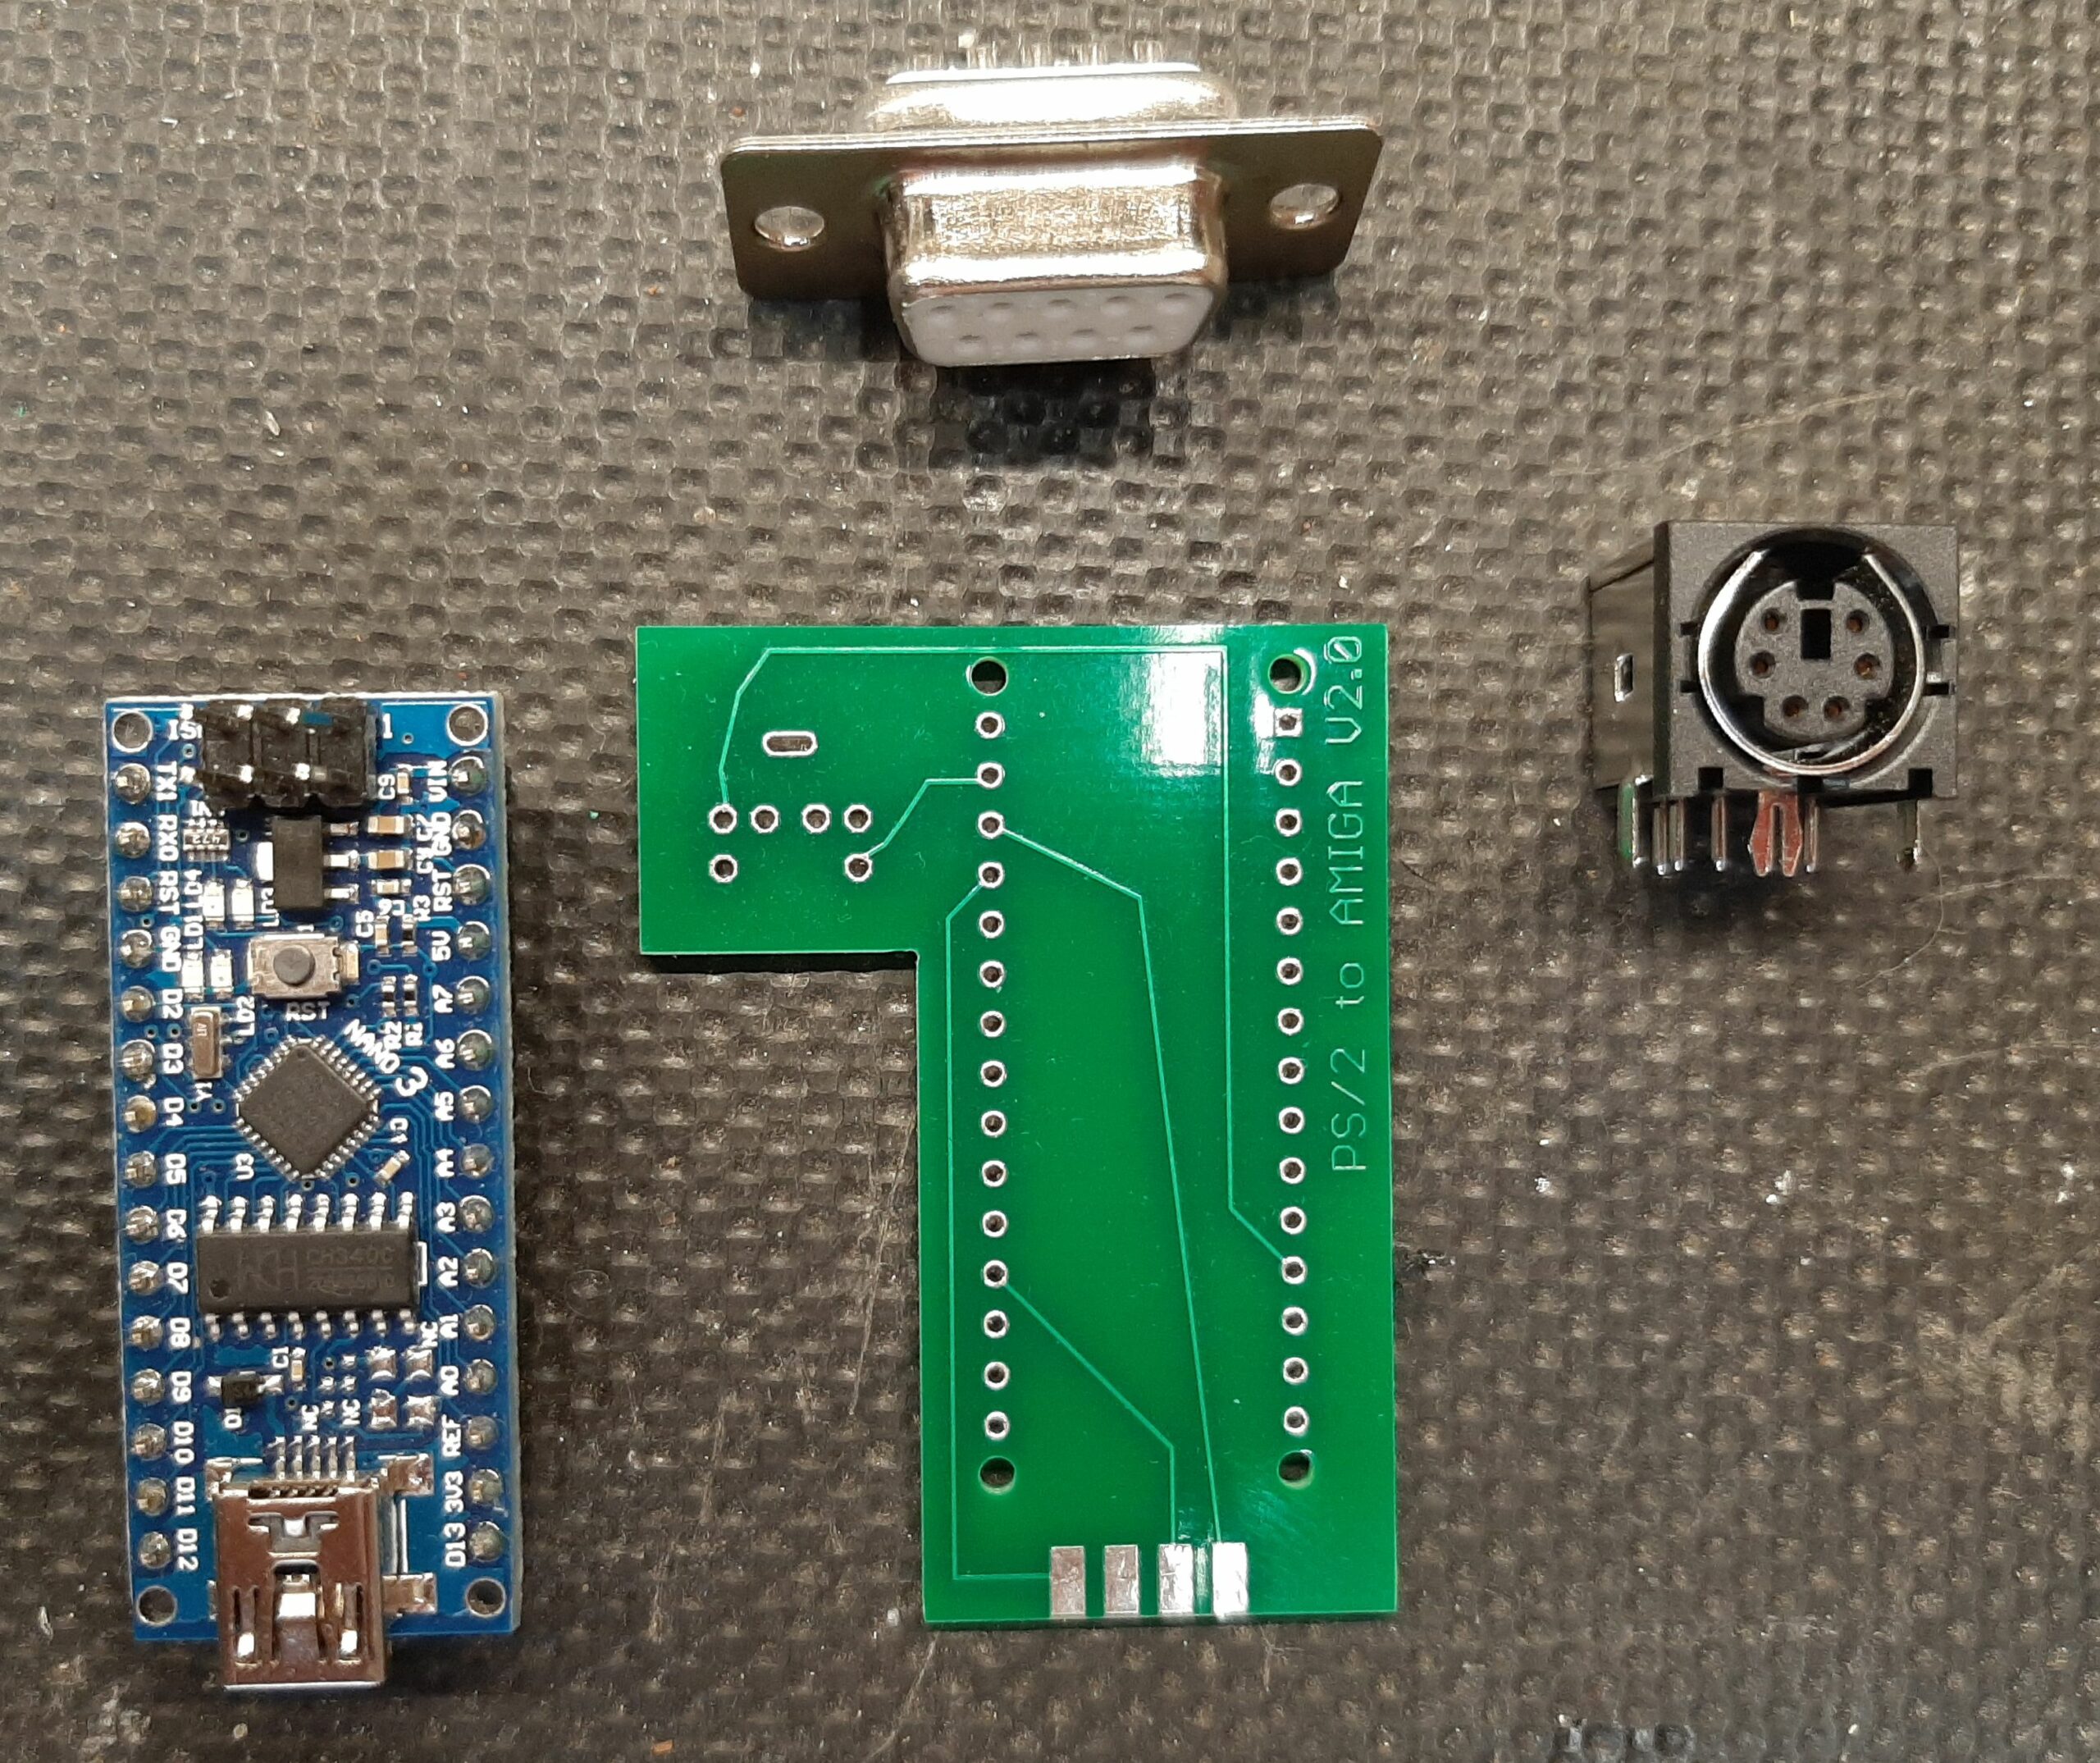
A PS/2 socket ( black or green the purple is meant for keyboards )
A 9 pin ‘D’ type socket
An Arduino NANO ( works with 168 or 328 versions )
Mini USB lead to power and program the nano
USB power pack
An ANanoMouse PCB (shared on PCBWay )
As you can program the NANO at any point let’s build the interface first.
First step slide the edge of the pcb between the pins onthe 9 pin ‘D’ type socket the pins match up with the pads 5 on top and four on the bottom. Center them as best you can.
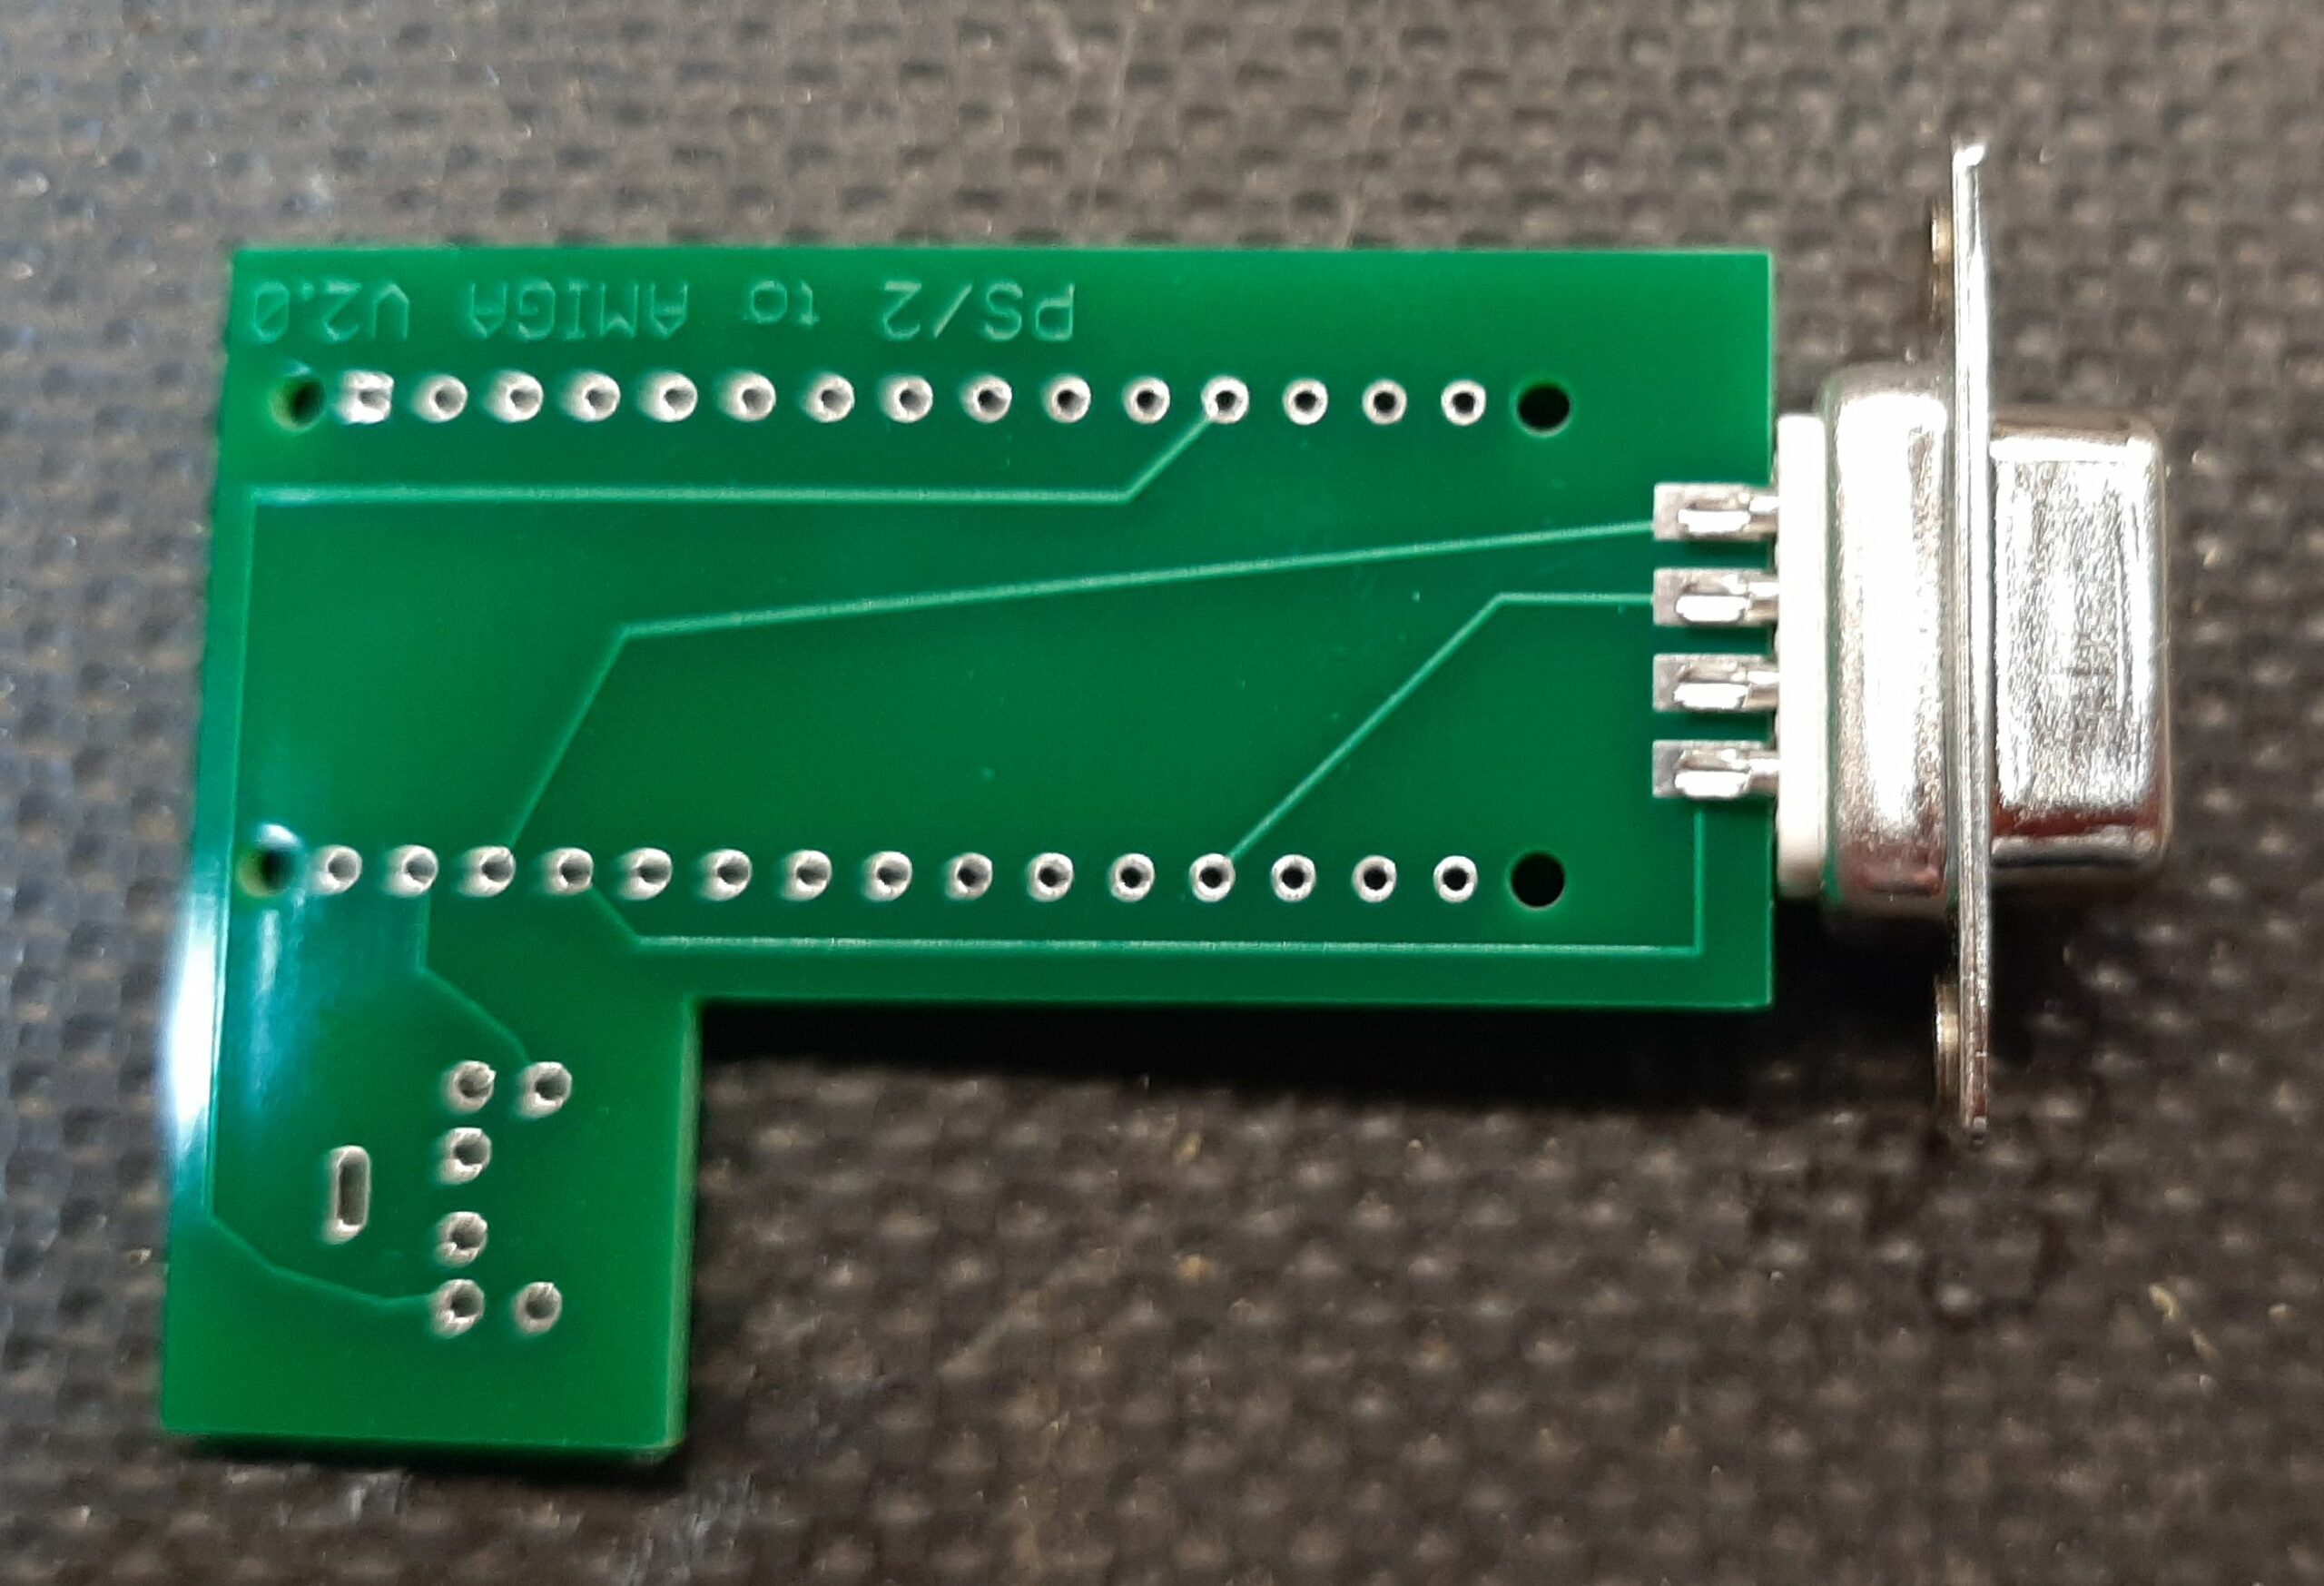
Once lined up they can be soldered.
Next is the PS/2 socket ( mine has side tabs and i just bent them up out of the way . Make sure you have the top of the board with the writing on ) and solder into place.
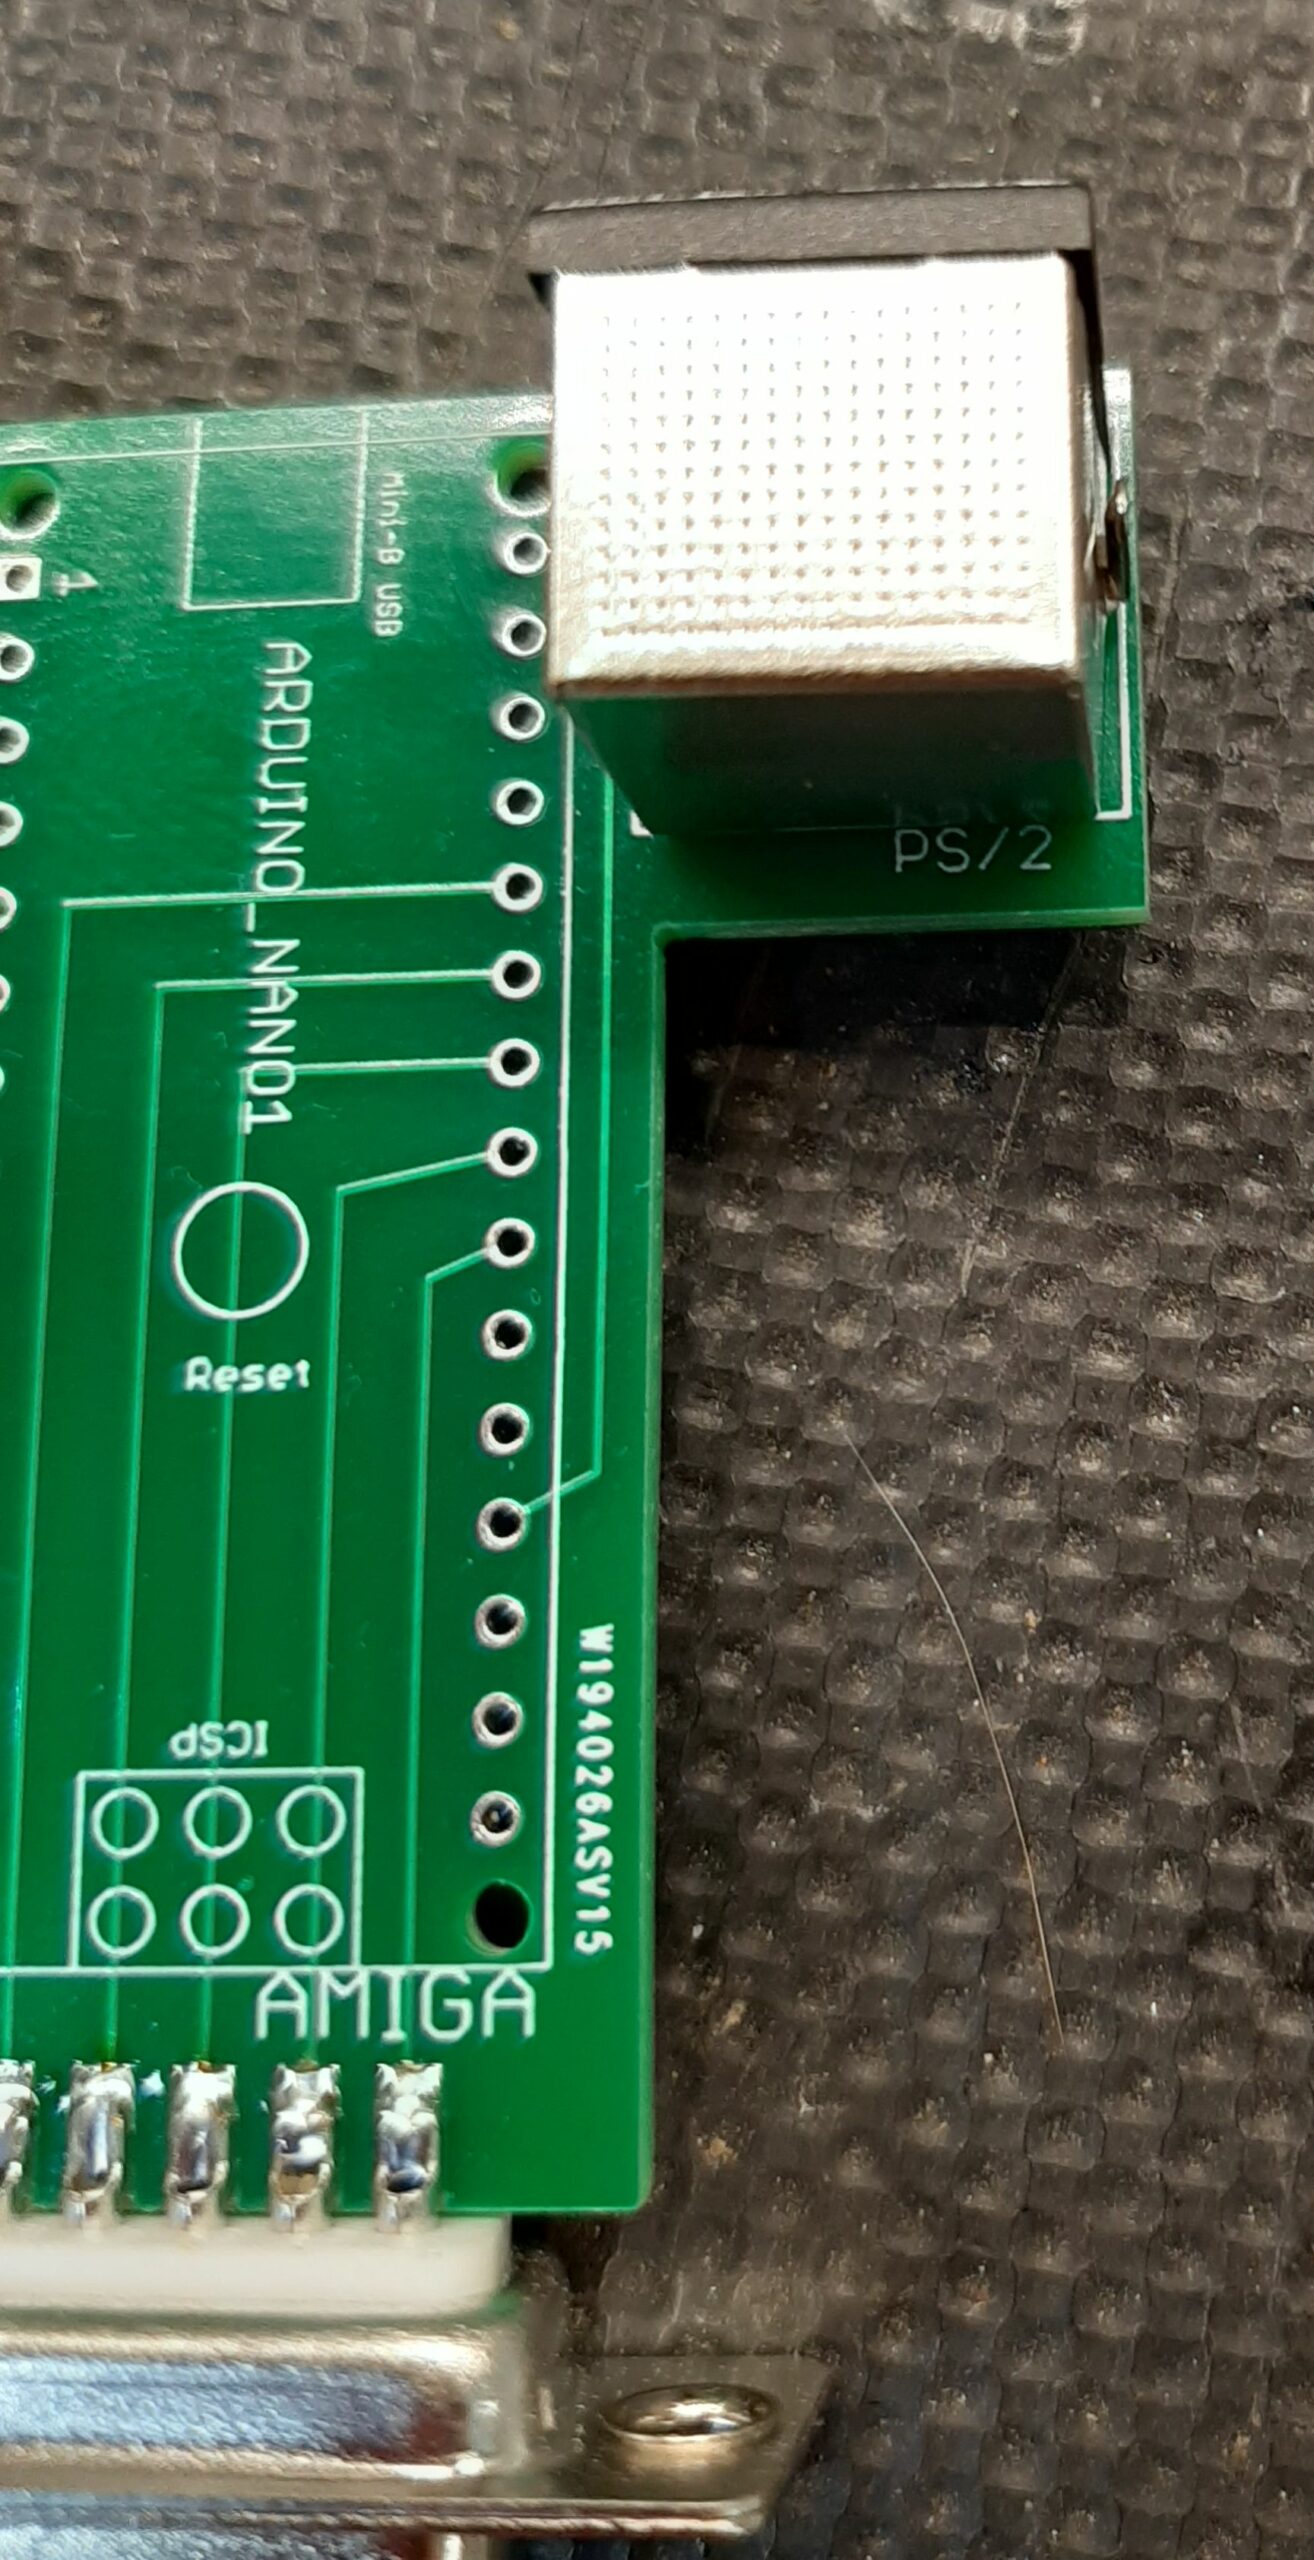
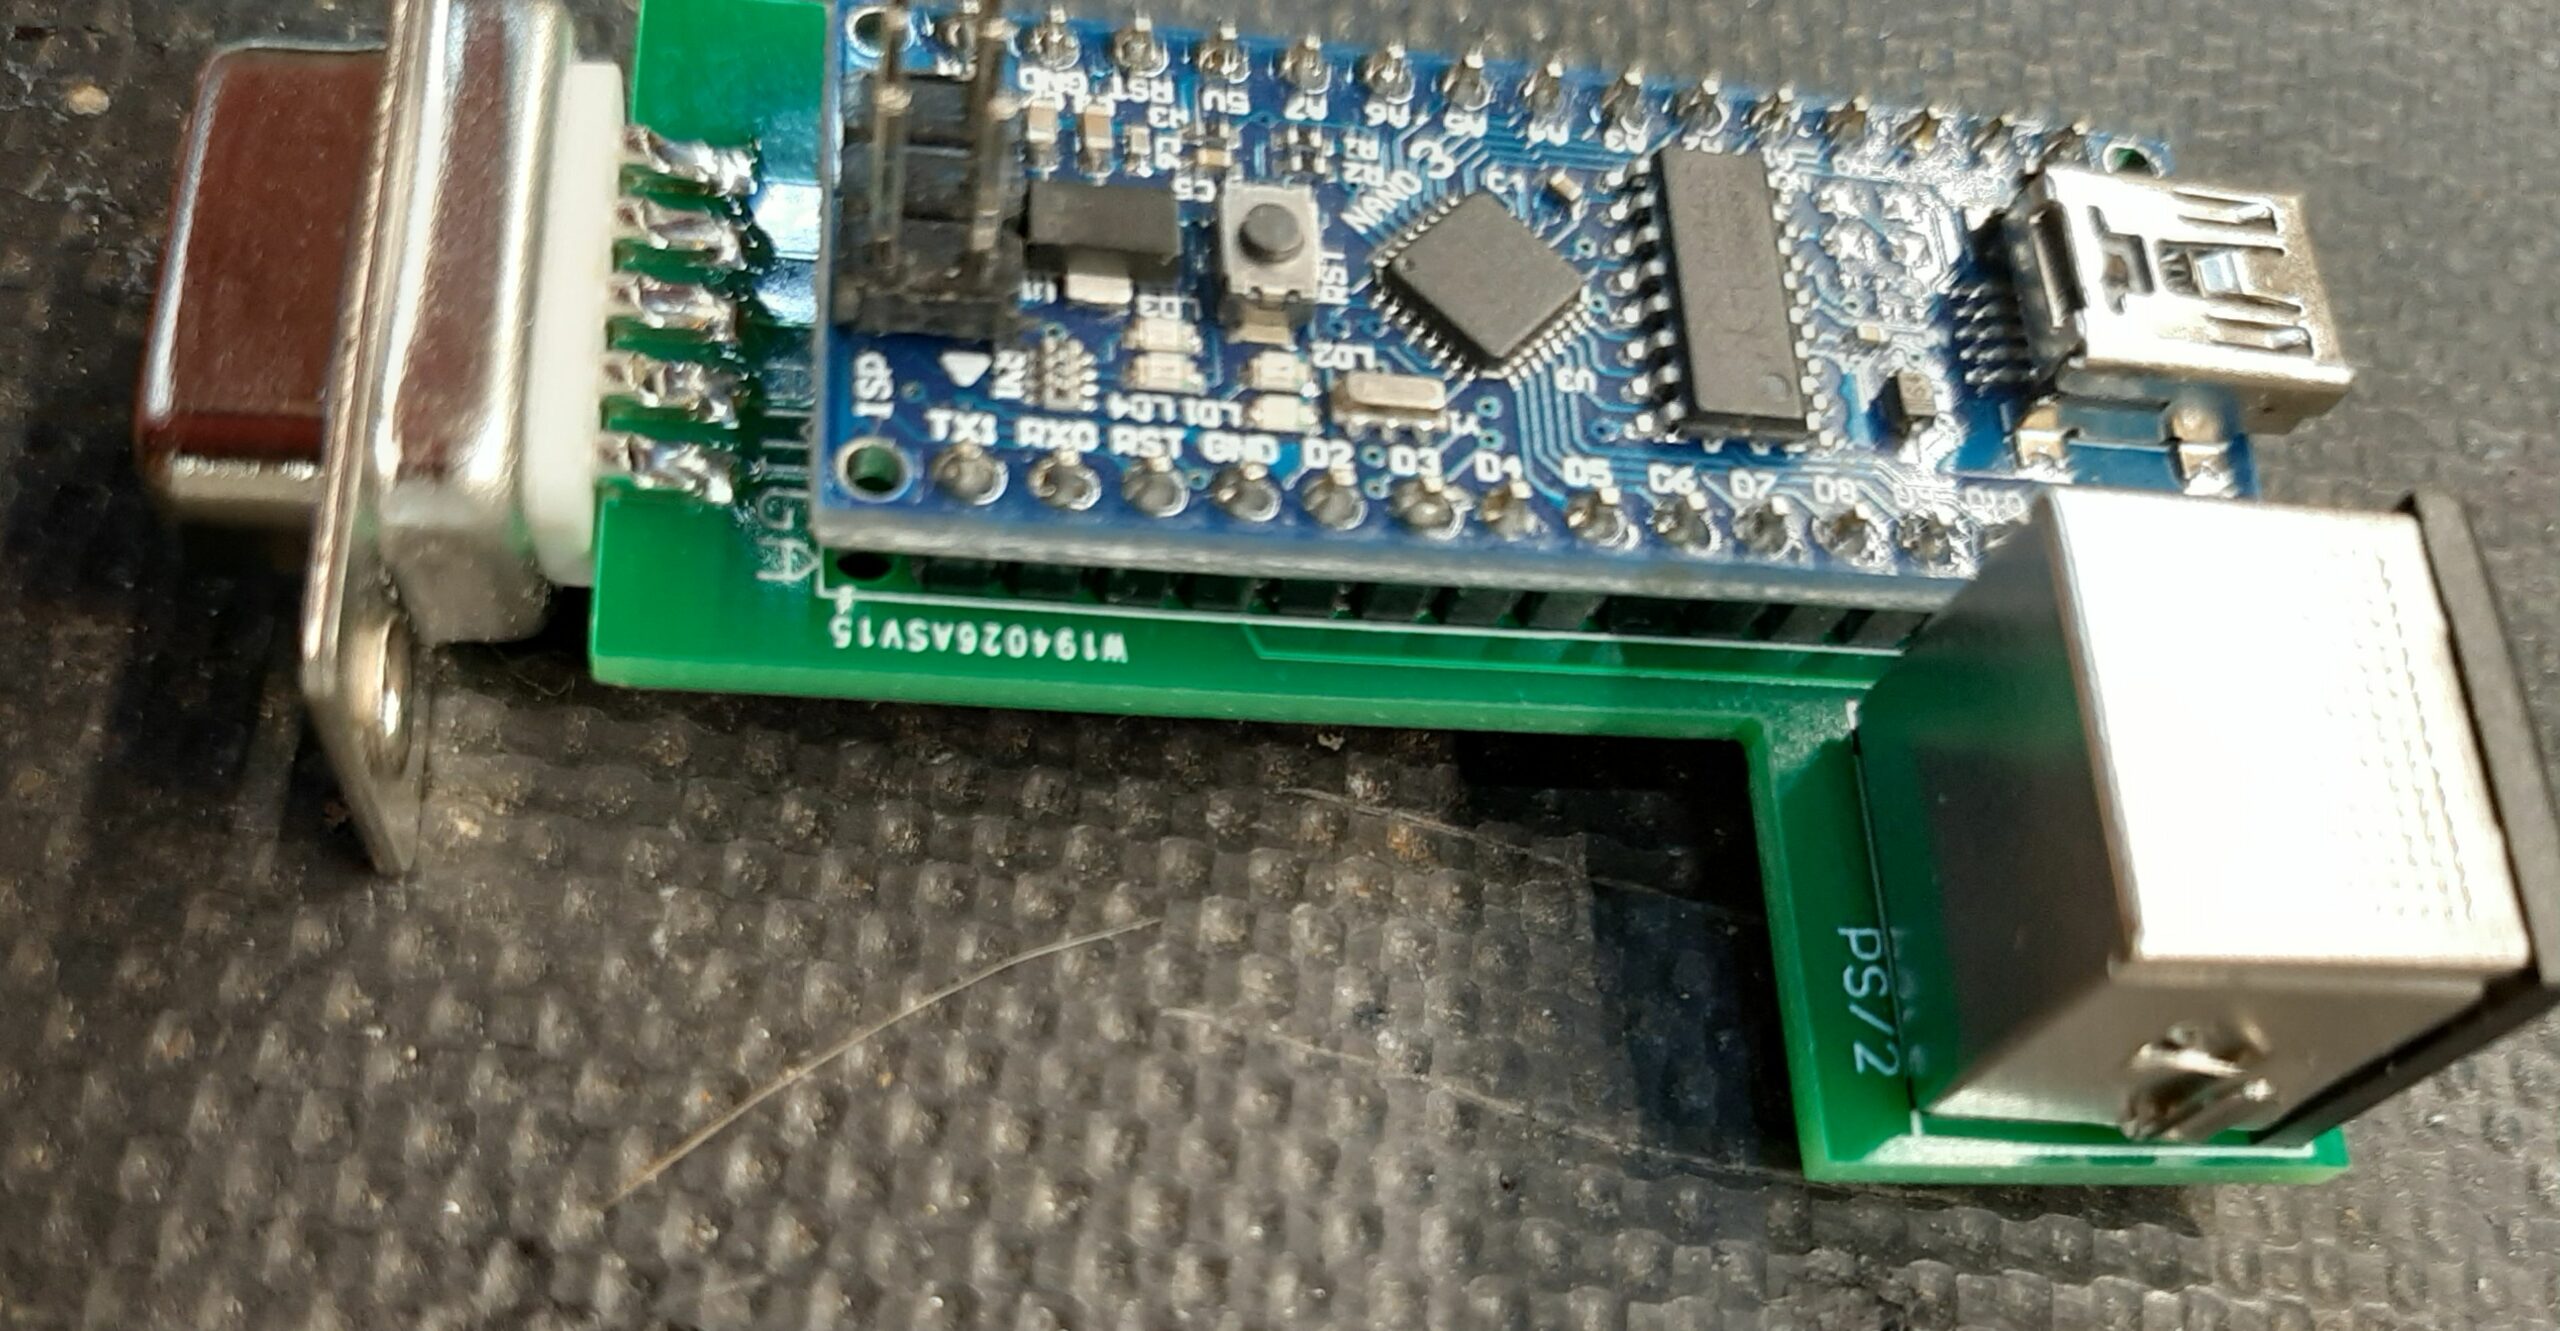
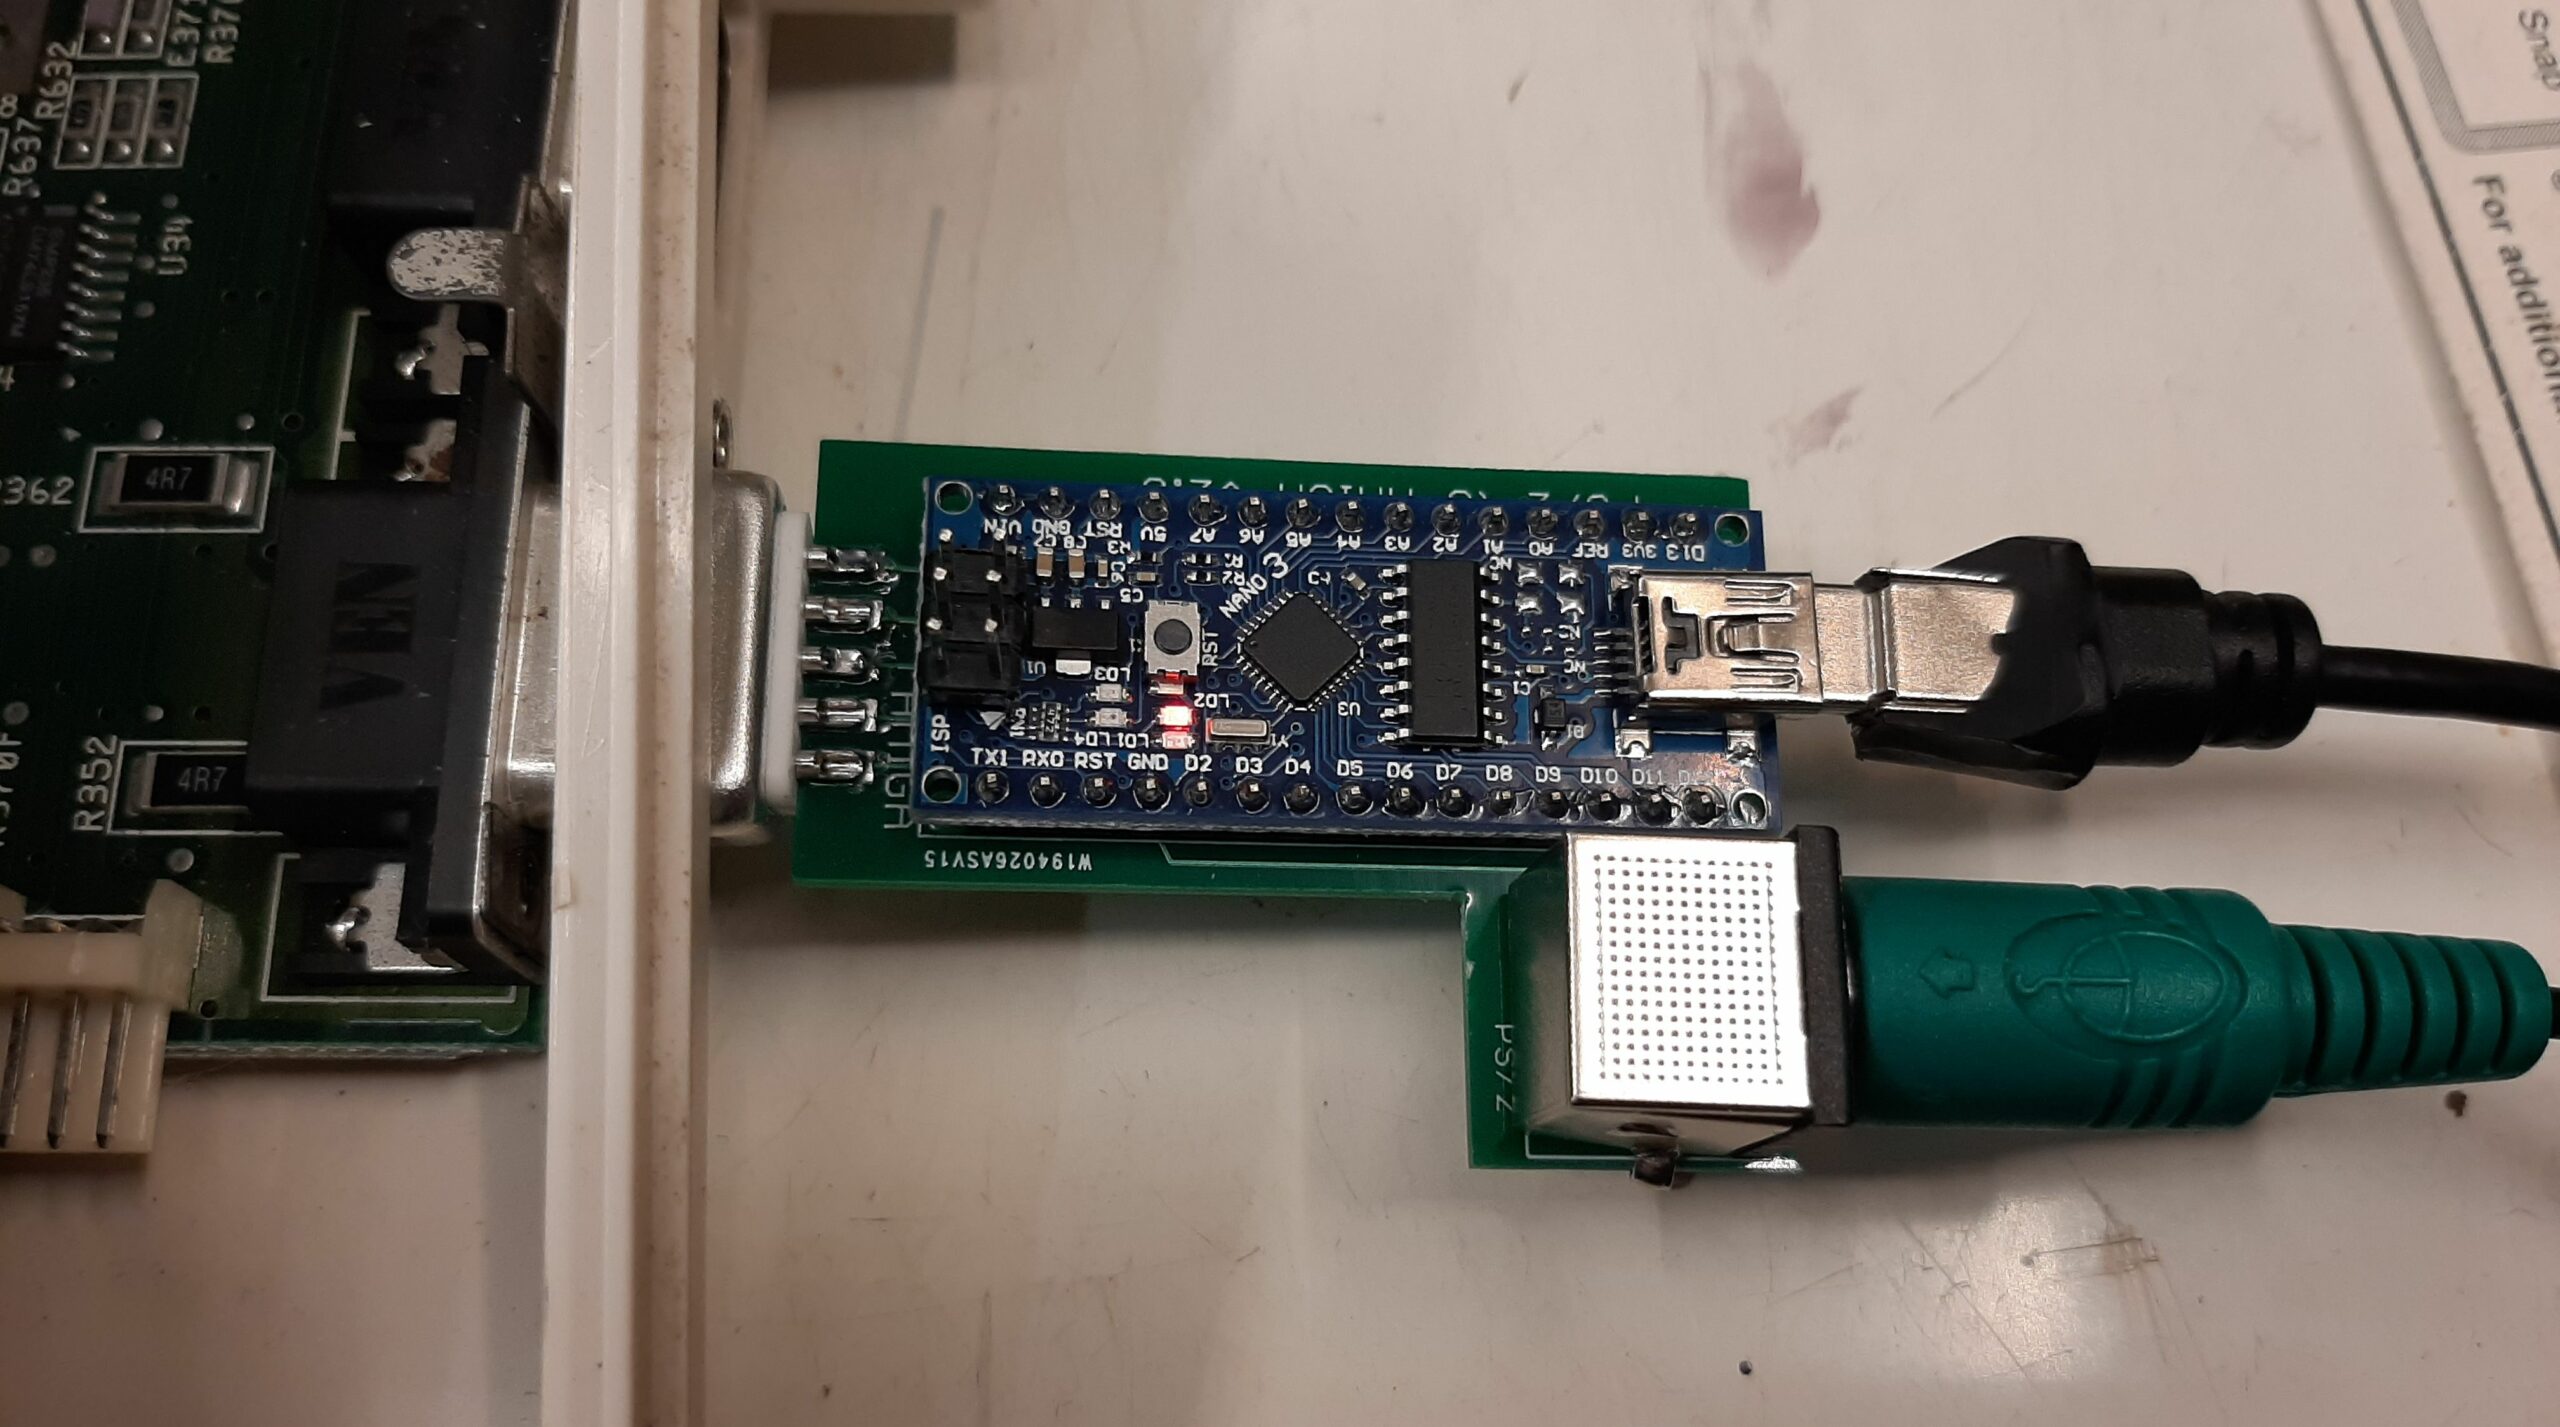
And then we fit the NANO following the drawing on the board ( with the USB connector beside the PS/2 connector ) and solder in place.
We don’t actually need the ICSP header so if you have a kit form nano you do not need to put it on.
Now you need to download the arduino IDE if you do not already have it. It is on the microsoft store for free , if you have windows. If you do not have windows there are plenty of web pages telling you how to install it and where the files are stored. I will only be dealing with windows 10 here.
Then download
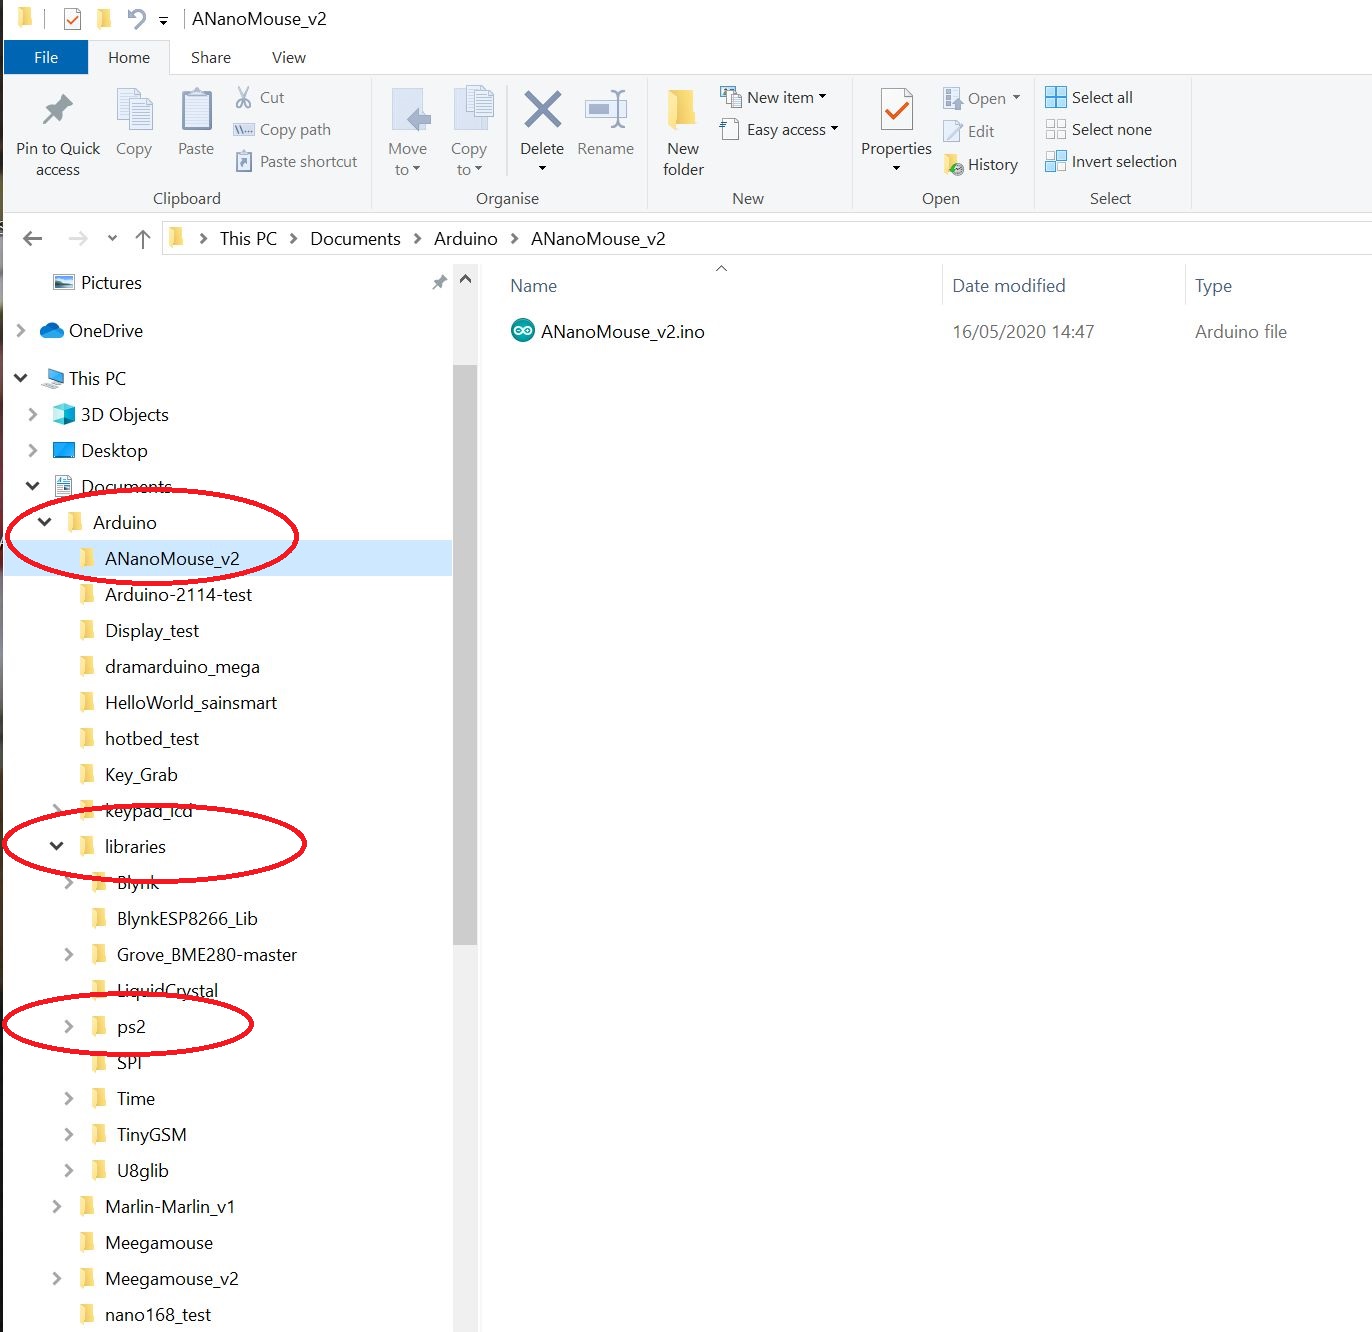
This file contains 2 directories one is the PS2 library that needs to go in your libraries folder.
the default is ( Documents/Arduino/Libraries )
and the ANanoMouse_V2 folder needs to go in the projects directory
the default is ( Documents/Arduino )
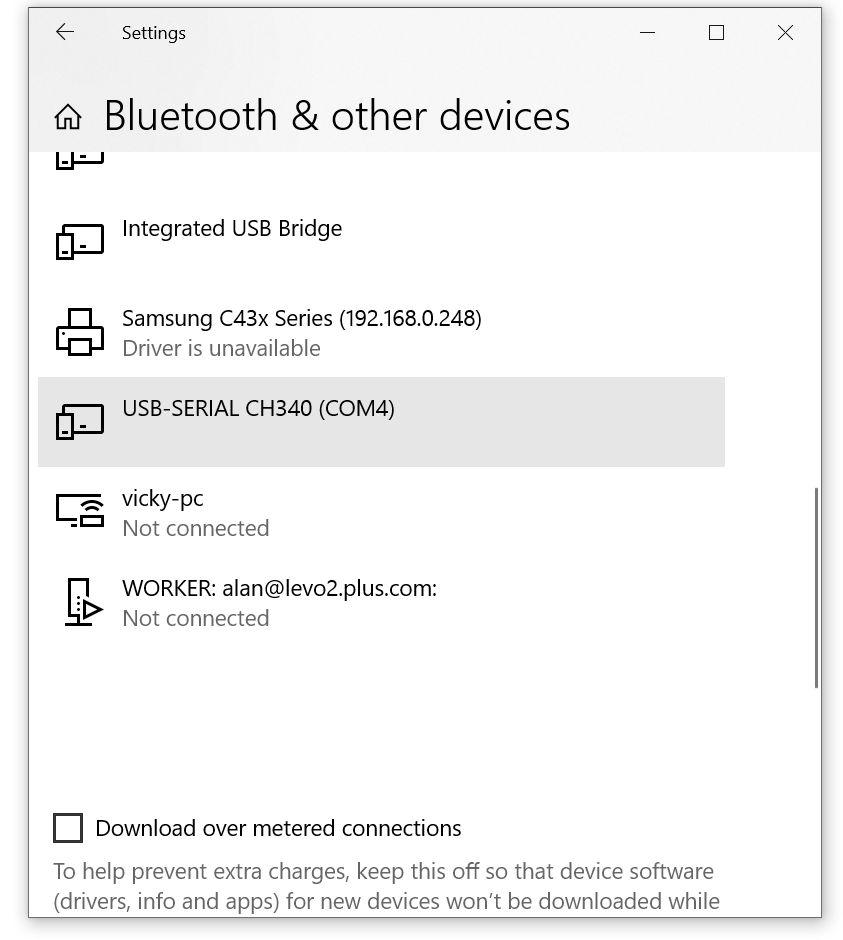
Next connect the nano to the PC with the mini USB lead. We need to know which port it is connected to , to find this go into settings and click on Devices.
This will give a list of devices connected to your computer look for the ‘ USB-SERIAL CH340 (COMx)’ the x is the no. that we need ( mine is COM4 ).
Now run the arduino ide . Click on file and click on open on the list that appears. navigate to the ANanoMouse_V2 folder that is in your list and click on the ANanoMouse_V2.ino and click open. The sketch will appear in the editor window. Do not edit anything it will be ready to go.
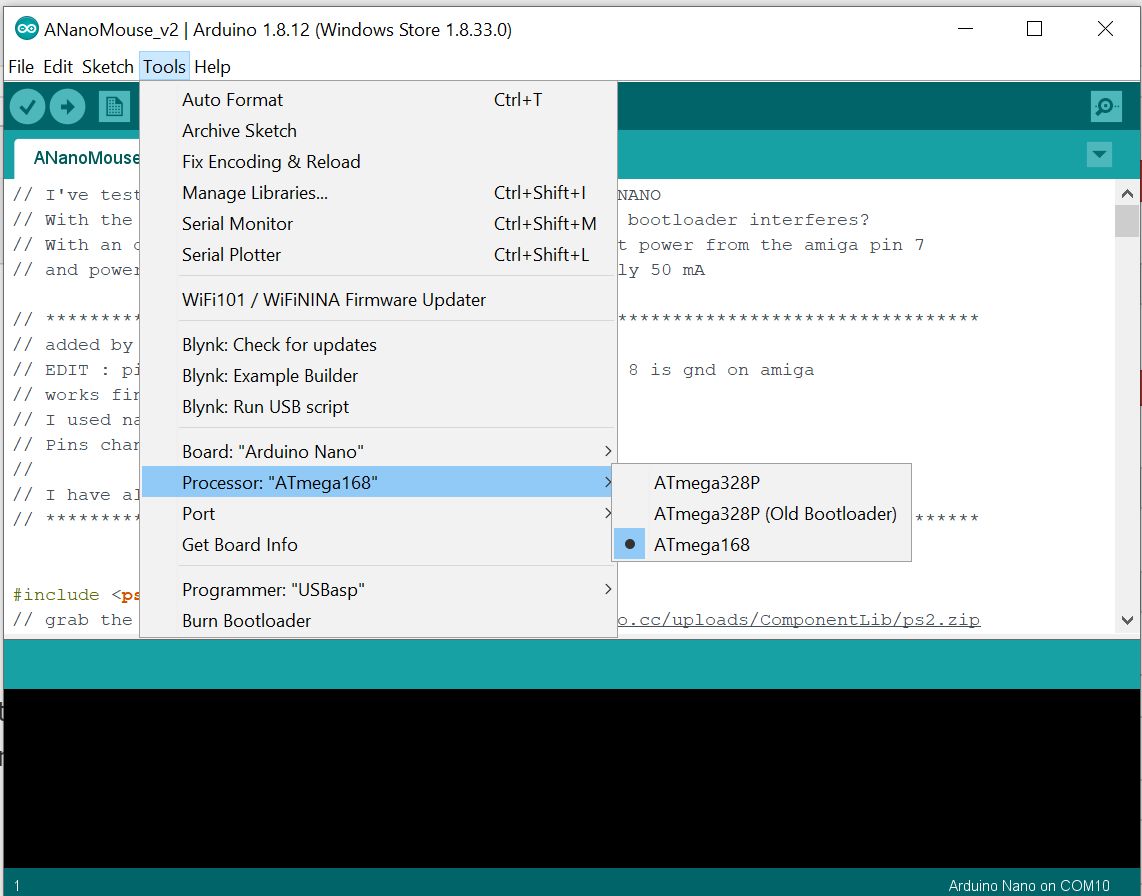
Then we have to setup the editor for your Nano this is done from the tools menu.
First select the board-

Then the processor ( mine is the 168 but yours could be the 328 )-
Then set the port that you got from settings
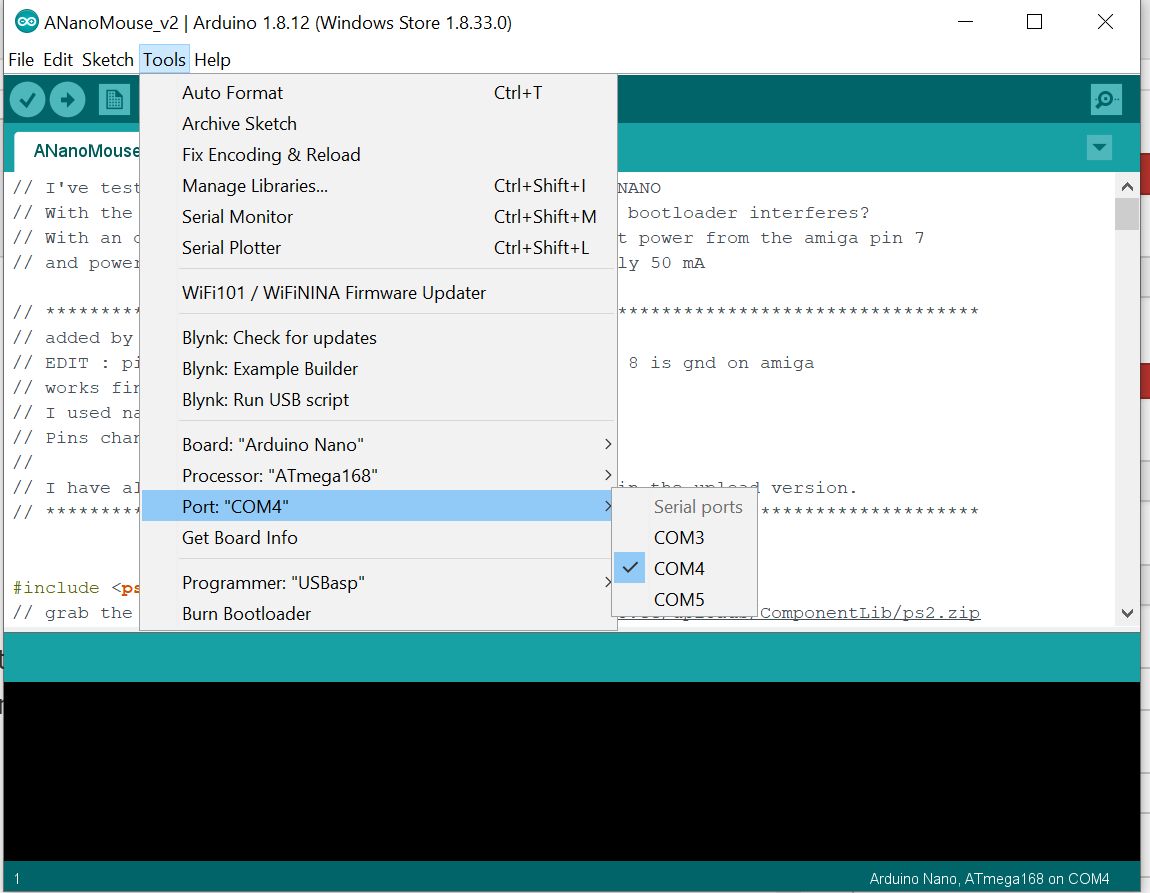
If you have not noticed in the bottom right of the Arduino IDE window it tells you the settings so that you can check they are right before uploading the sketch.
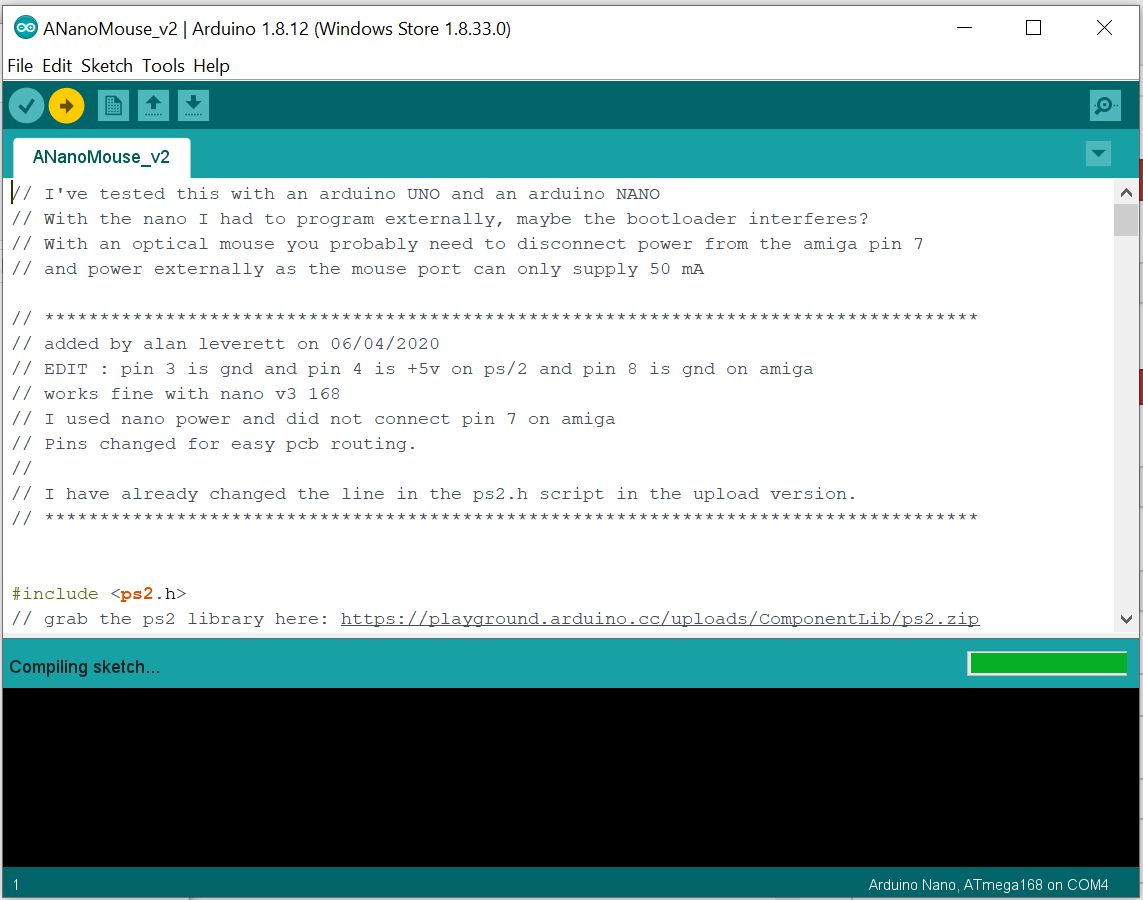
Hit the upload button ( the arrow under the edit tab ) and once it has compiled it will upload to your Nano.
All Done your ANanoMouse is ready for use!
Tested with the AMIGA 500, 500+, 600 (mouse port only), 1200 , 2000
and CD32 and fits and works fine.
I cannot say about CDTV , 1000 , 3000 or 4000 as I don’t have one!
( But I cannot see why it would not ).
REMEMBER you MUST ( if you have not done the diode mod ) power the Nano for this to work!!!
Here is ANanoMouse plugged in to an A600
On a final note Powering ANanoMouse from the amiga requires 1 diode (IN4001 or similar).
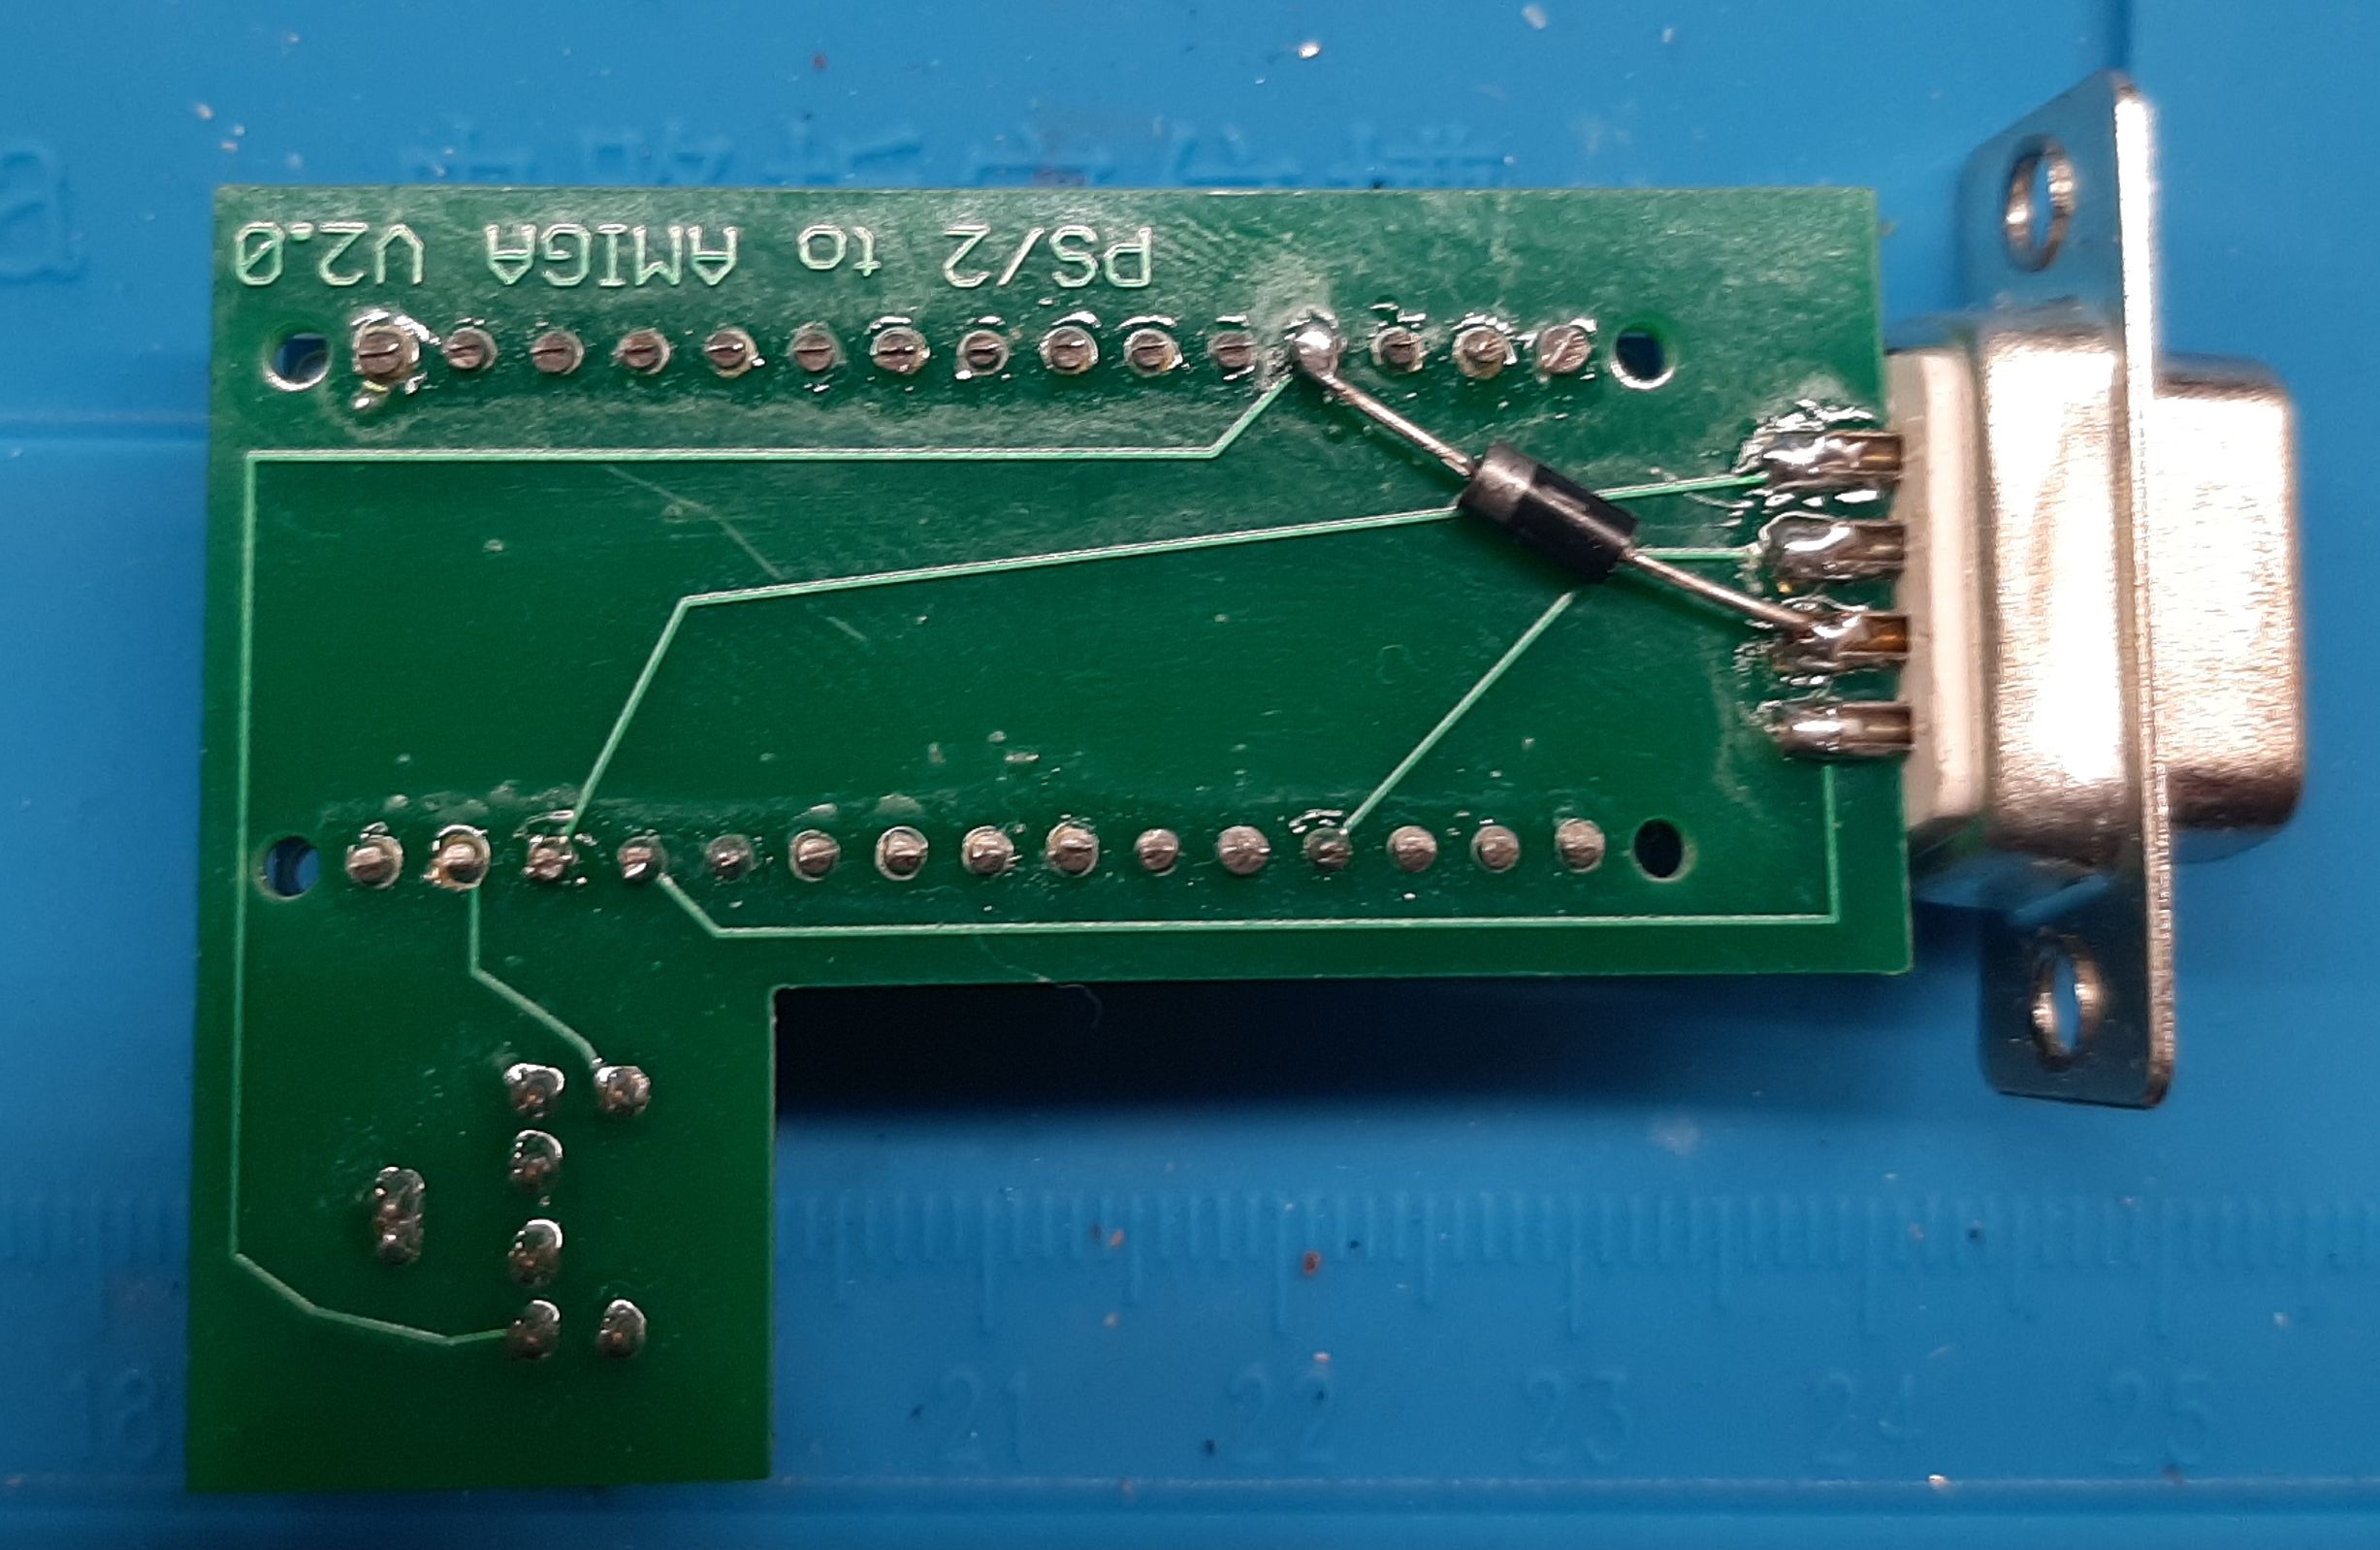
Now the ANanoMouse can be powered by the AMIGA or the power lead without any problems. The diode stops the 5v from the nano affecting the AMIGA and allows the amiga to power the nano if the power lead is not in!!
This article gives so much more info than similar blogs, and it’s immensly helpful to me. Will follow you to see future writing from you! can I share this?
Yes I am quite happy for you to share .