
Goal:- Replace 4116 chips with 4164 chips and make pack more reliable.
Please note that this will not give you more ram even though 4164’s are 64k the ram pack is only designed to address 16k.
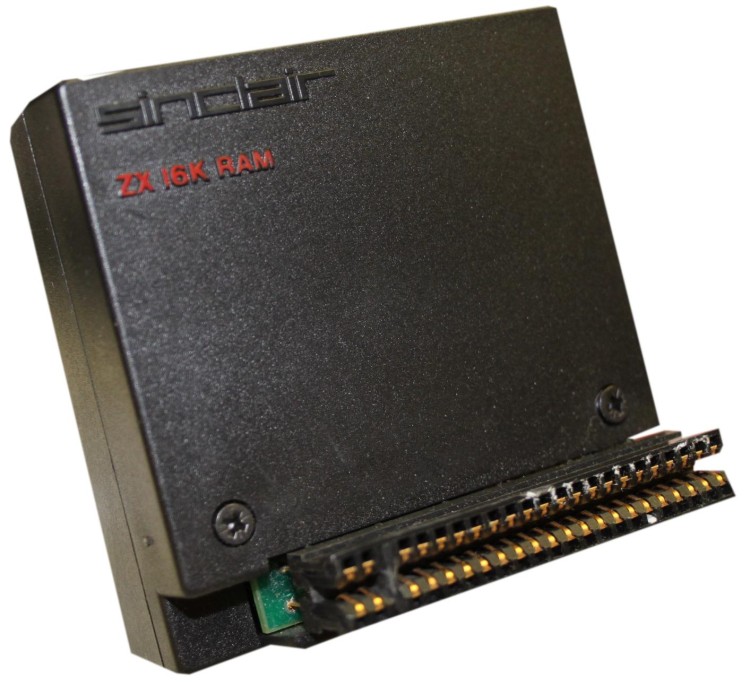
Got a Rampack to repair?
fed-up with blown 4116’s?
have 4164’s laying around?
Then this article is for YOU!
I have been looking to repair my 16k rampacks for my ZX80 and to make them more reliable . There are lots of places on the web that tell you that you can use 4164 as a replacement for 4116 , but none that show you how! So here we go.
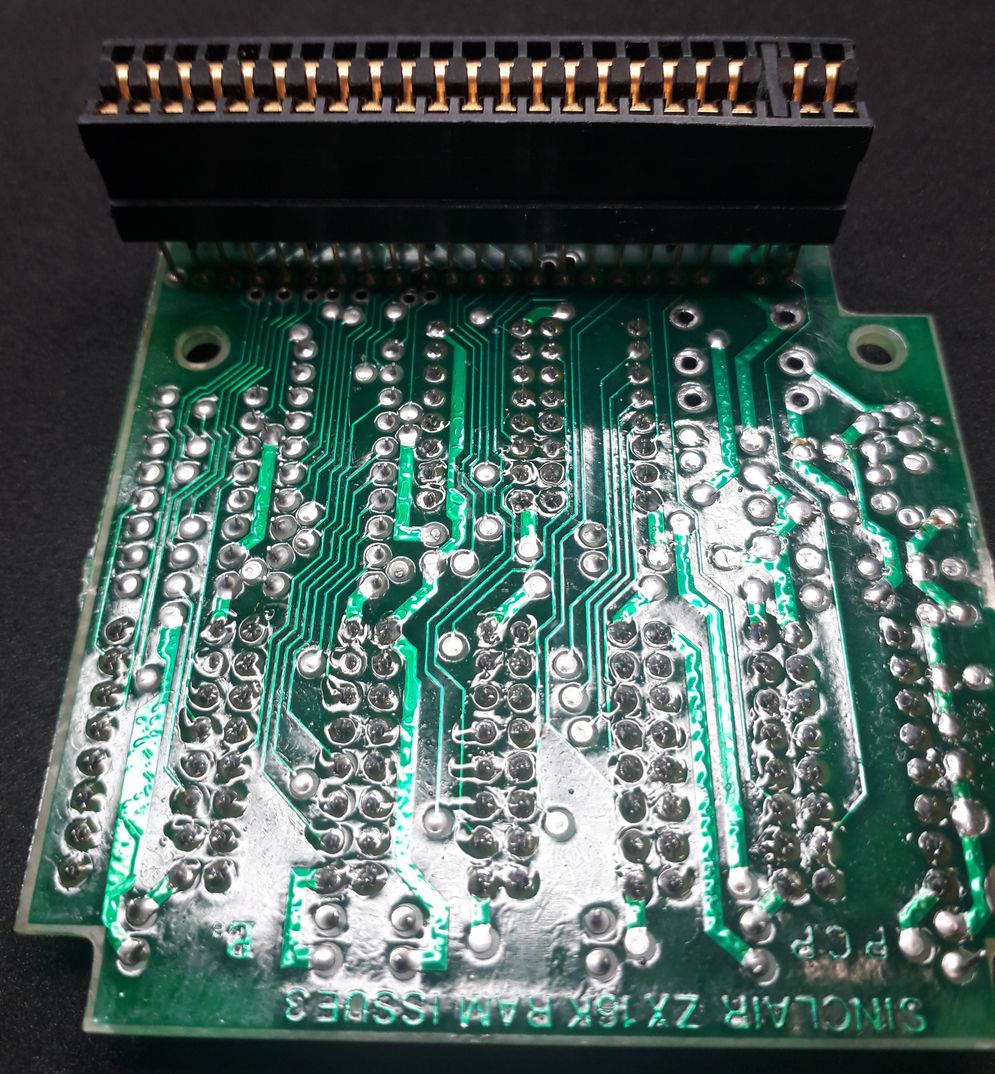
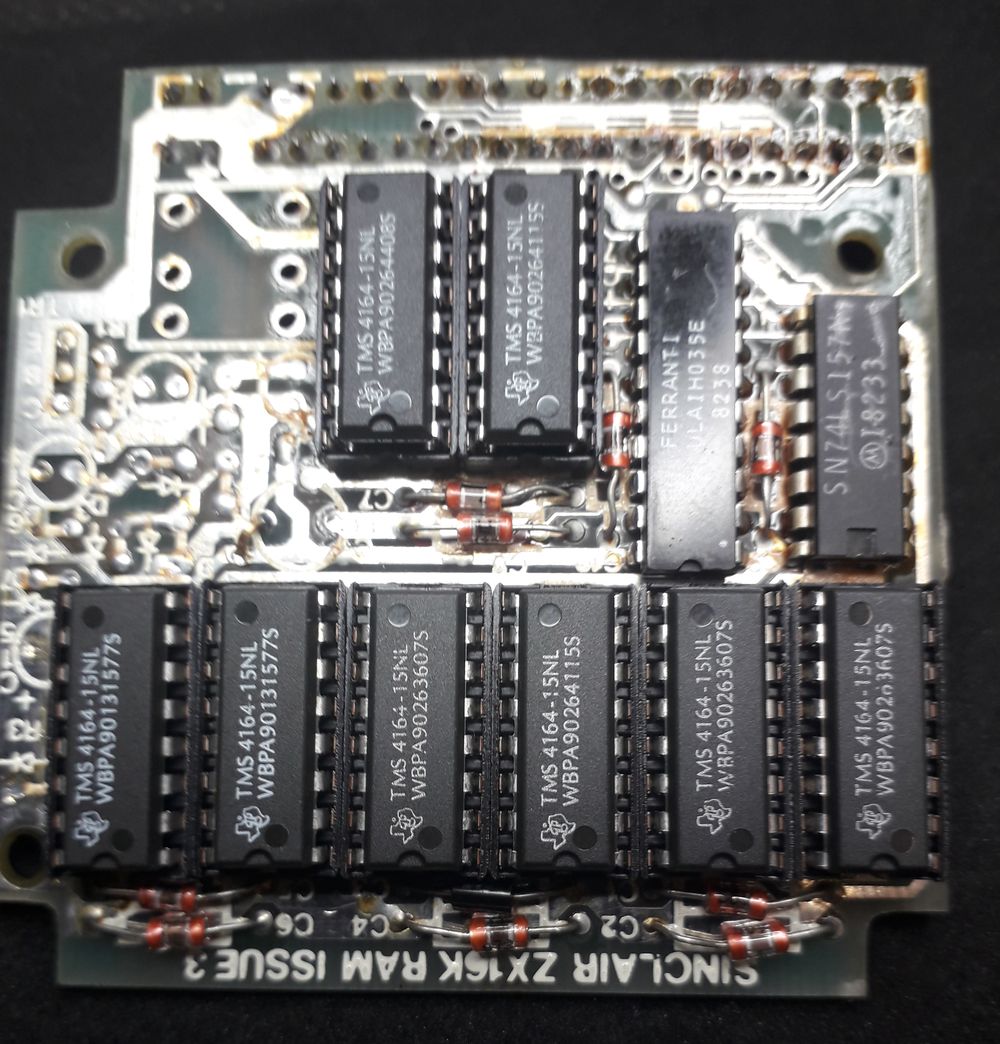
The stock issue 3 board looks like this.
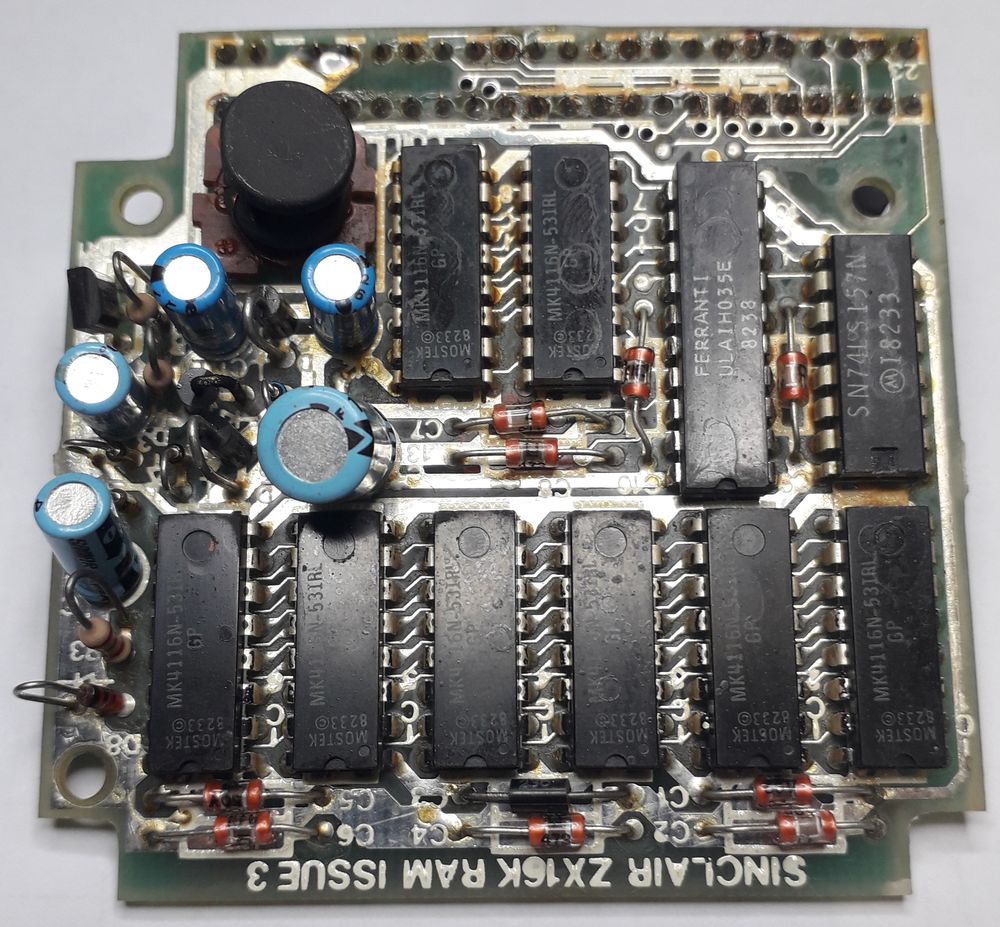
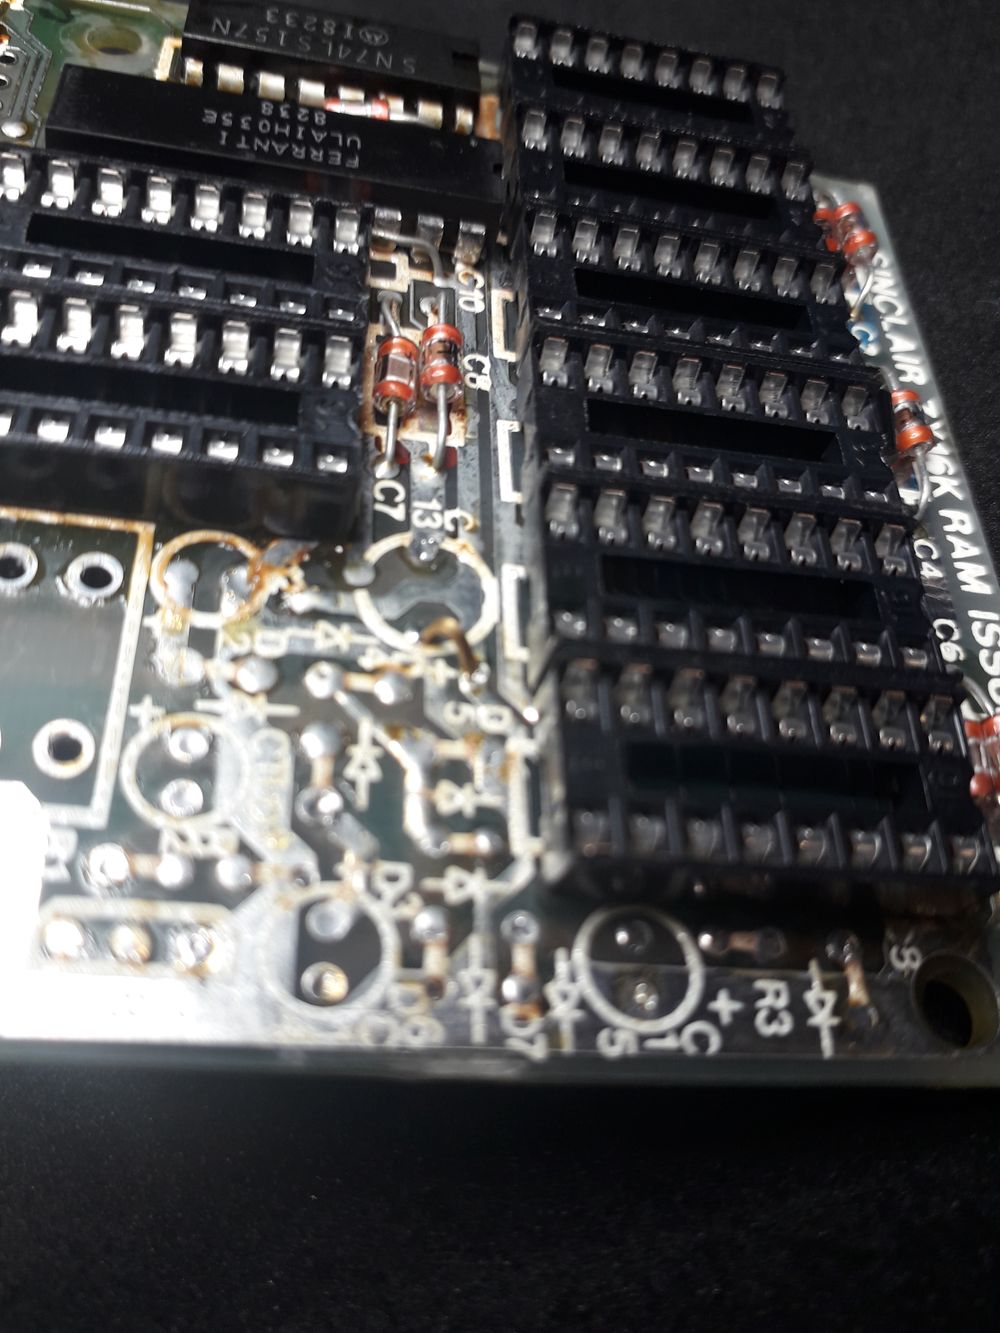
We need to remove most of the passive components so that the voltage generator circuit is gone. The 4116 chips require a -5v and +12v supply in addition to the standard +5v . 4164 chips only require +5v , this is the main reason why they are more reliable.
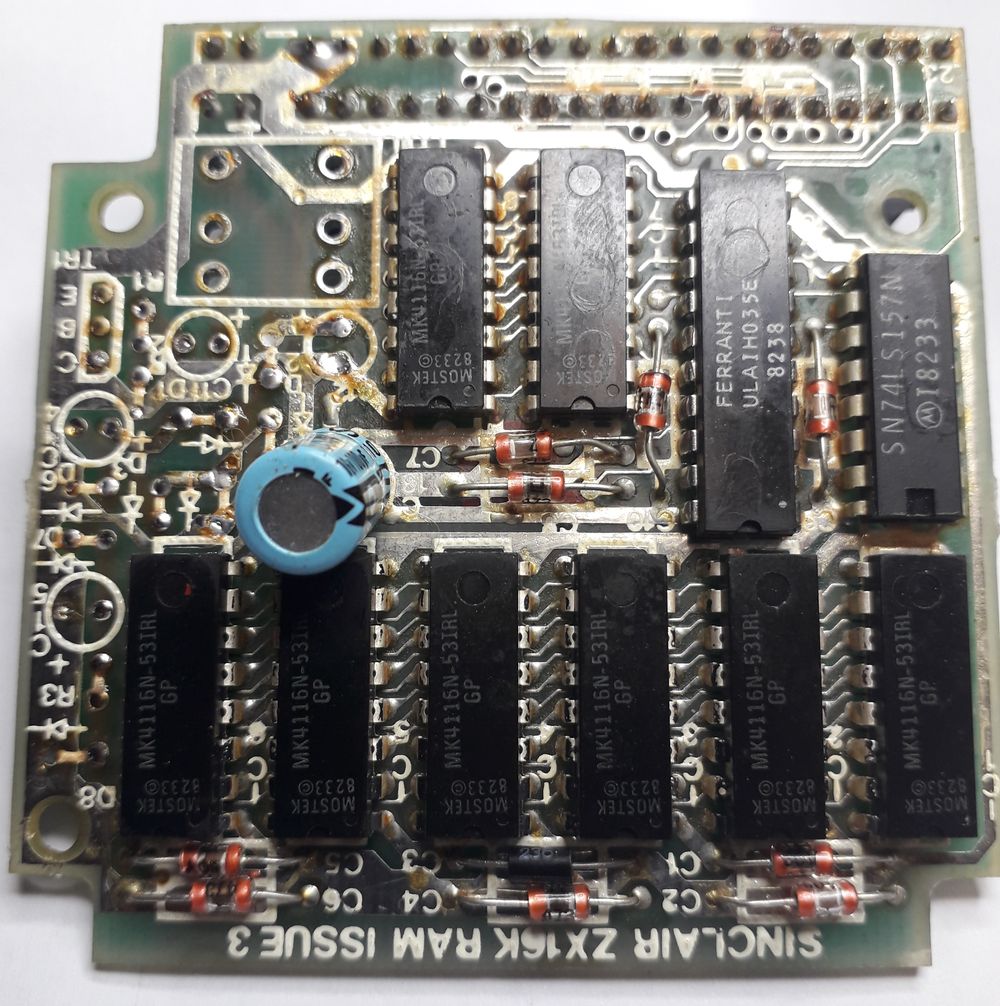
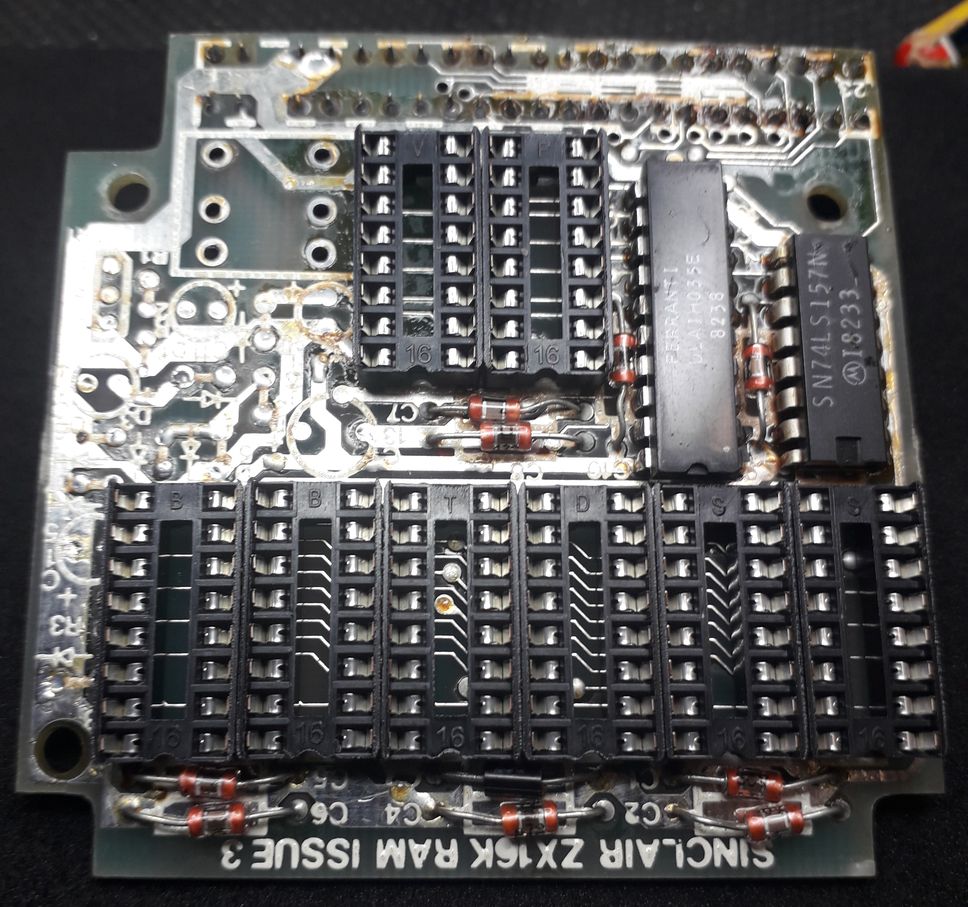
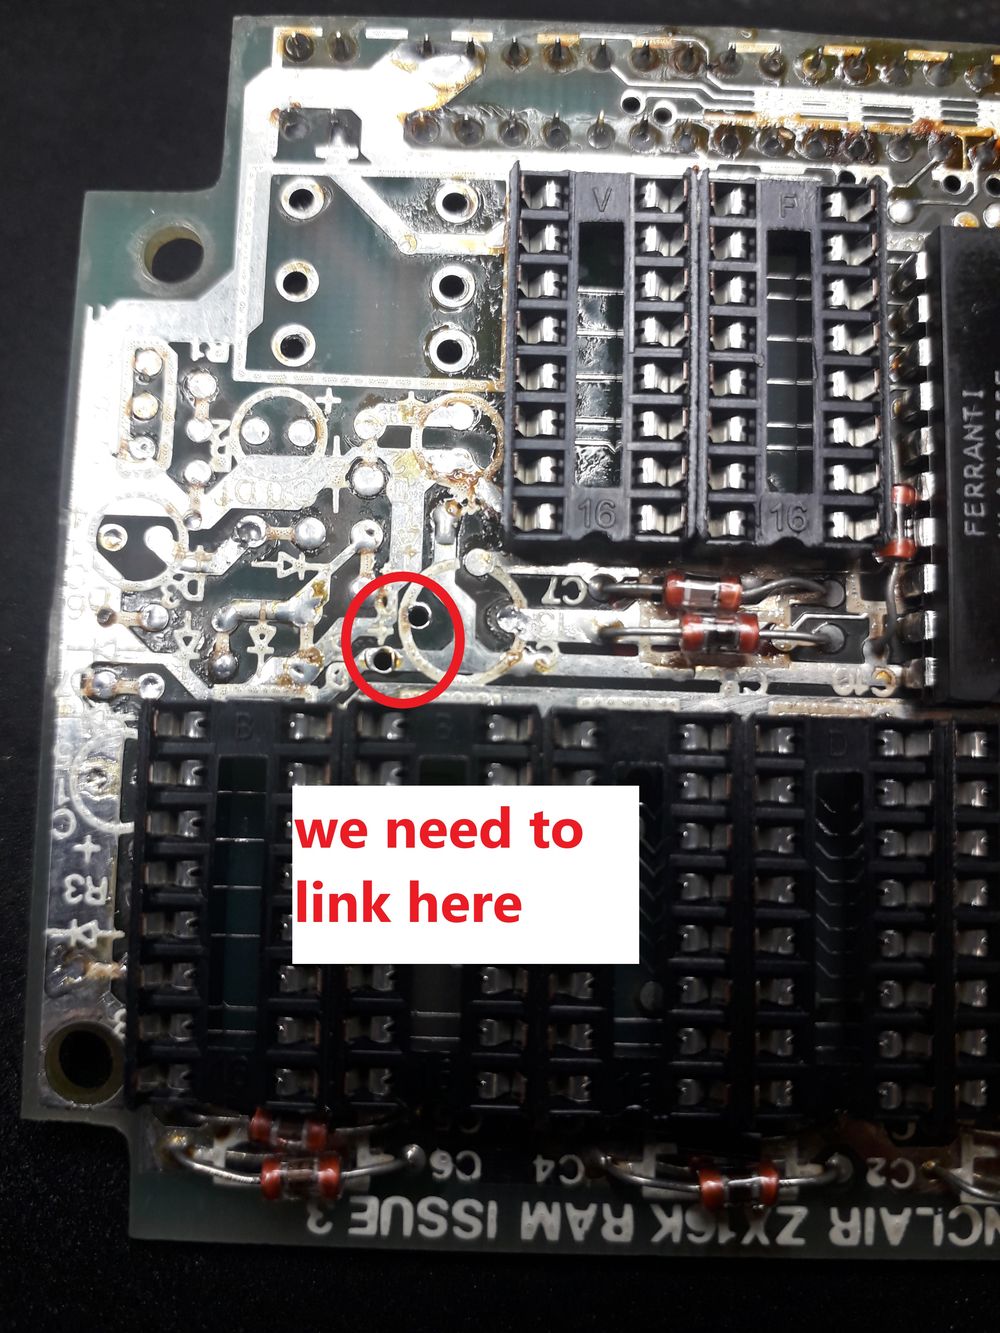
The next step is to remove the 4116 chips and replace with sockets , and remove the 100uf capacitor. Visually check the board to make sure that you have not broken any tracks or made any solder bridges before and after fitting the sockets.
Now before we populate the board we need to look at the differences between the chips.
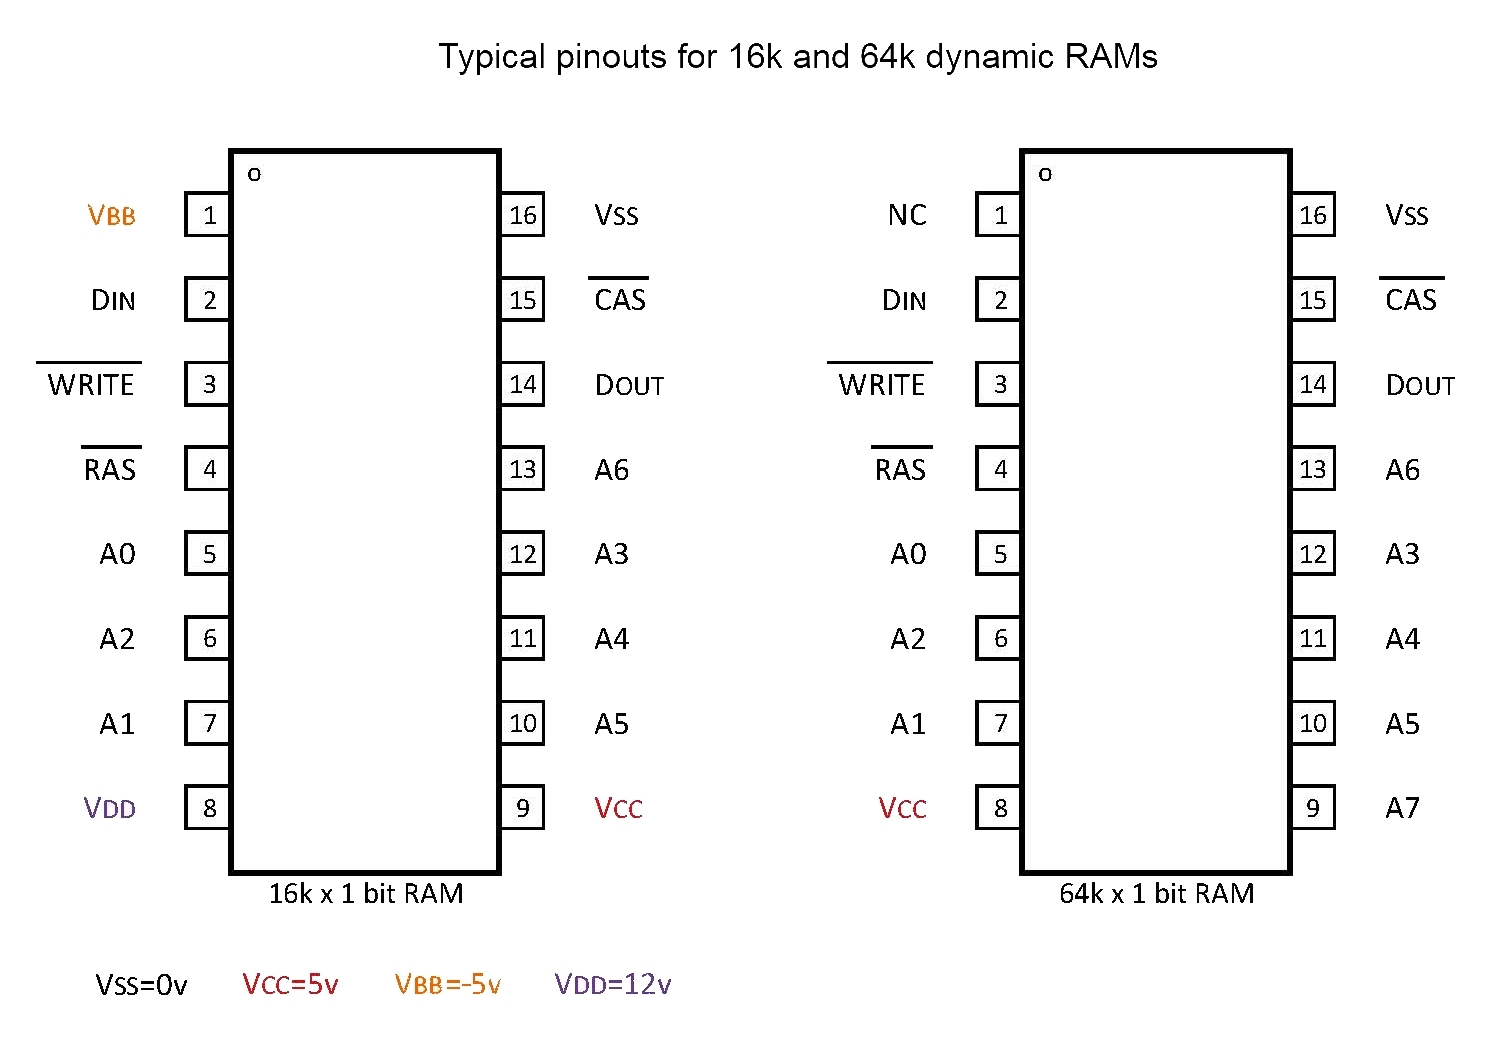
having removed the voltage generator circuit VBB and VDD no longer exist and this will not cause any problems , however the 5v supply for the chip has moved from pin 9 to pin 8. the address line A7 is not required for the 16k ram and will be ok at 5v ( we would need to tie it to 5v anyway ) however we now need to link at least one chip from pin 8 to pin 9 so that all our chips can get the 5v supply. Remember these are bus driven chips so all the supply and address/control lines are linked it is only the data lines that are separate.
Looking at the board the easiest place to link is at the 100uf capacitor position. i have cleared the holes to make it easier to see.
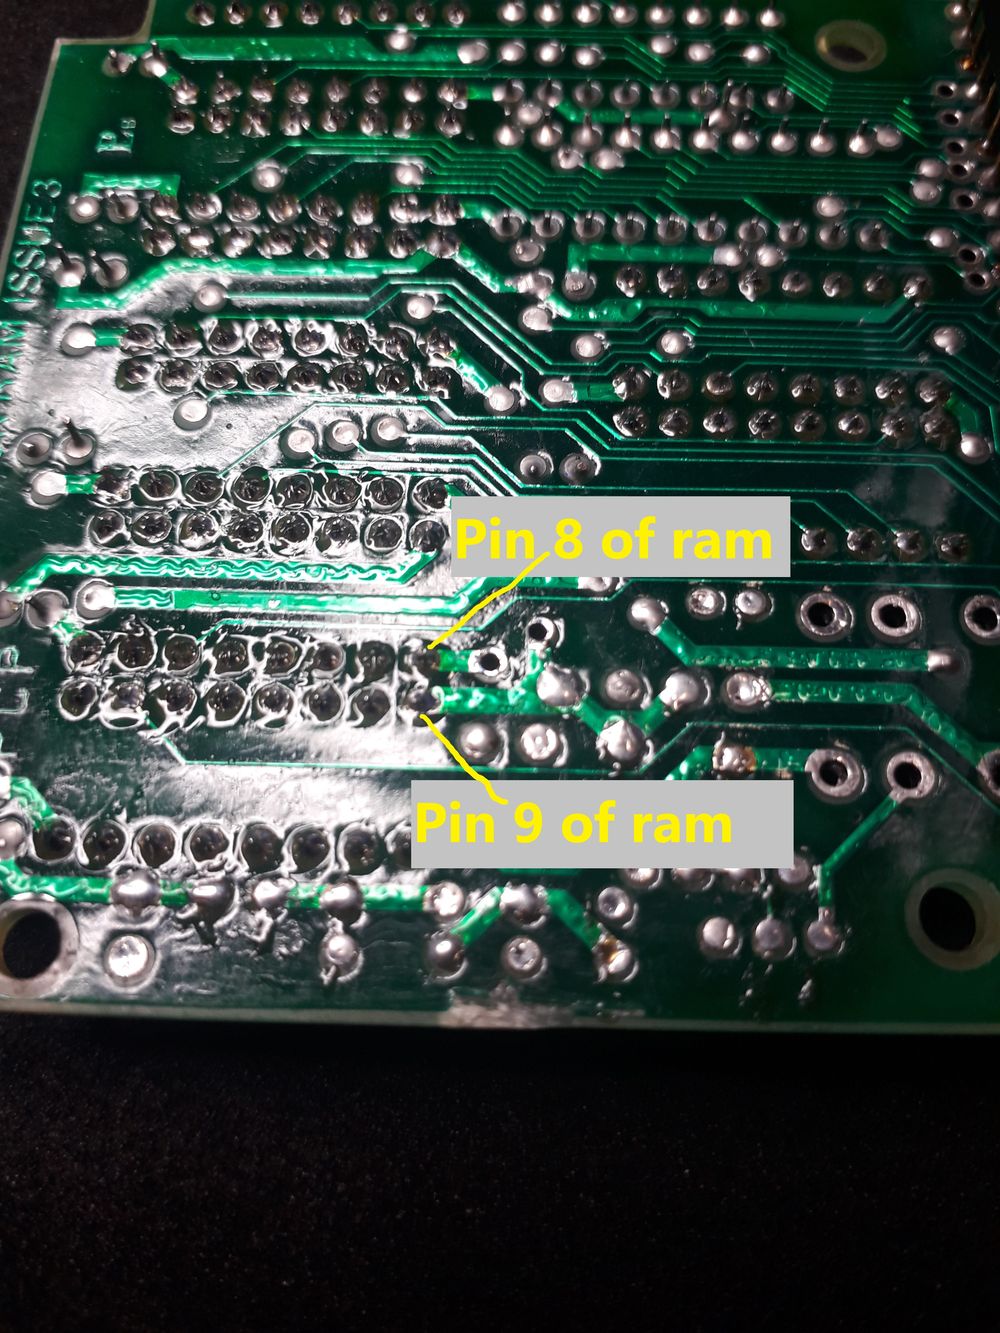
Check the position carefully and insert a link.
Now we can populate the Board ( put the chips in )and test it.
plug it into my zx81 and turn on.
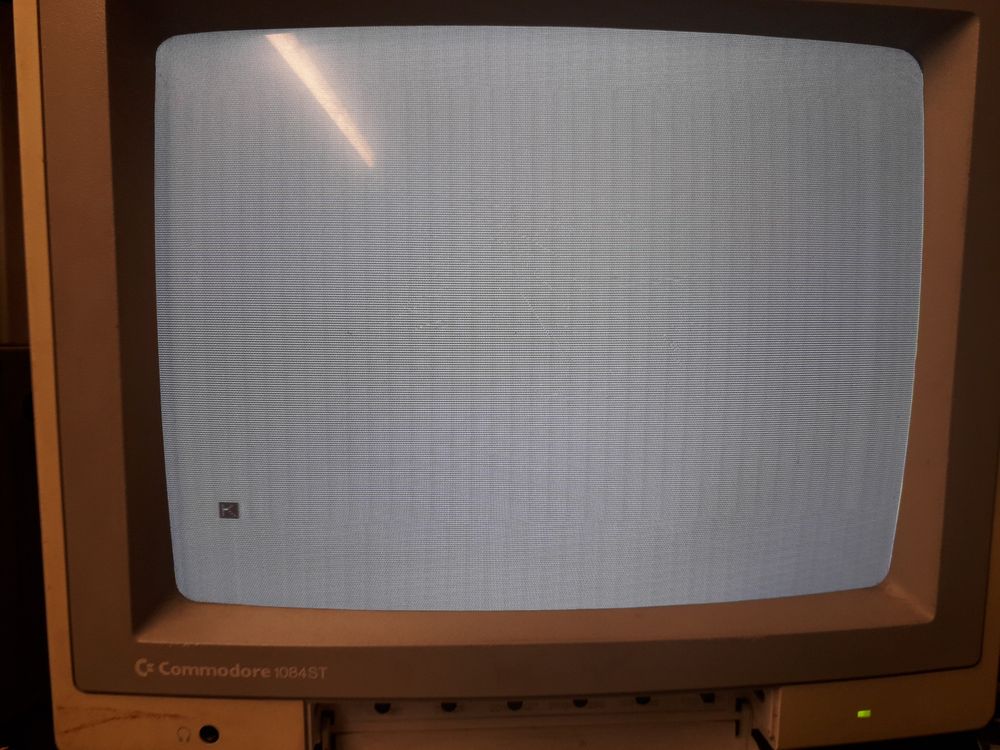
YAY!!! we have a color inverted K in the corner of the screen that shows that the zx81 has performed its initial memory test and is ready to program.
RAM PACK FIXED!
What a great article, what are your thougts on machine pined sockets as I noticed you have not used them for this fix?
Yes another great comment .
Normally I would use turned pin sockets wherever I can as they are ideal for both IC legs and turned pins , and they are much more reliable than dual wipe sockets .
This time my budget , and the fact that these chips are not going to need raplacing for some time , got the better of me and I did the cheaper option .
Outstanding article have performed the surgery on one of my dead ram packs and I now have a live one! Many thanks for enthusing me into action.
Just found this article, very interesting, my issue 3 ram pack in now repaired using the 4164 chips. I also found out that the reason the ram pack never worked was because one of the diodes on the power line was open circuit which in turn kept burning out the ZTX 750. Out of interest, I have now repaired several issue 1 and issue 2 boards. Check the power circuit first (diodes, caps and ZTX750 and shorts) and if you get a white screen without a cursor, then piggy back 8 x 4116 rams chips on top of the existing ones, then remove 1 by 1 to find the culprit… hope this helps someone….
I have an Issue 2 pack – so if it works I’ll send the details and you will have a complete repair guide.